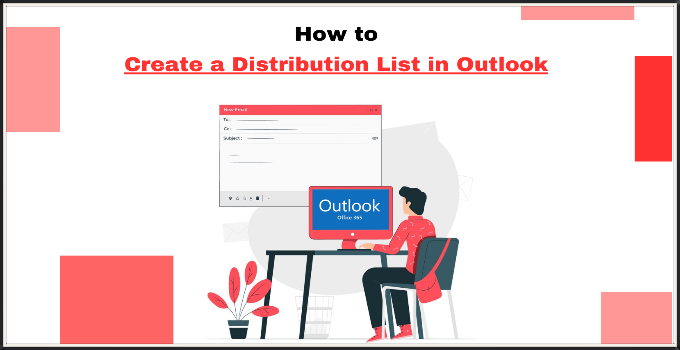
Complete Guide: Create a Distribution List in Outlook
Outlook is a comprehensive email management tool, that offers two main versions: Outlook 365 and Outlook 2016. In this comprehensive guide, we’ll walk you through creating distribution lists in both versions, providing insights into their unique interfaces. Whether you’re a novice looking to create a distribution list in Outlook for the first time or an experienced user seeking advanced tips, this guide has you covered.
A Quick Look at How Distribution Lists Work in Outlook
Think of distribution lists in Outlook as your handy shortcut for group emails. They let you send messages to many people at once, making it easy and quick.
Why Distribution Lists Are Essential in Outlook
Ever wished sending updates to your whole gang was a breeze? That’s where distribution lists come in handy. They make sure your messages get to the right folks hassle-free, whether it’s your team, your project buddies, or anyone you’re keeping in the loop.
How to Create a Distribution List in Outlook 2016
- Open Outlook 2016: Fire up Outlook 2016 on your computer.
- Head to Contacts: Look for the “People” tab at the bottom. Click on it to enter your Contacts.
- New Contact Group: See the “New Contact Group” button at the top. Click on it.
- Name Your Group: Give your group a name that makes you smile. This is your crew, after all.
- Add Friends: Click “Add Members” to choose the contacts you want in your group. These are the folks you’ll be sharing news and jokes with.
- Save and Close: Don’t forget to hit “Save & Close” when you’re done. Your distribution list is now ready to roll!
How to Create a Distribution List in Outlook 365
- Open Outlook 365: Launch your Outlook 365 like you normally would.
- Go to the Contacts Section: See that “People” icon at the bottom left. Click on it, and you’re in the Contacts section.
- Start a New Contact Group: Hit the “New Contact Group” at the top. This is where the magic begins.
- Name Your Group: Give your group a catchy name, something that screams “This is my awesome team” or whatever fits.
- Add Members: Click “Add Members” and choose your contacts. They’re the ones lucky enough to be part of your exclusive group.
- Save it: Hit “Save & Close” because you’re done! Your distribution list is now ready for action.
Related Article: How to Add Signature in Outlook: Step-by-Step Guide
Navigating Outlook Versions
Getting around Outlook is a bit like exploring different neighborhoods. You’ve got your Outlook 365, all modern and chic, and then there’s the classic Outlook 2016, like your favorite cozy spot. Let’s take a leisurely walk through these versions, no tech talk, just friendly guidance.
Understanding the Interface Differences
Imagine redecorating your favorite room—Outlook does that too! Each version has its unique look, but don’t worry, it’s like giving your place a new paint job while keeping the comfy couch. We’ll help you get the hang of it, whether you’re in Outlook 365’s modern vibe or soaking up the classic charm of Outlook 2016.
Outlook 365:
- Sleek and modern design
- Streamlined ribbon with easy-to-find features
- Unified and user-friendly interface
- Accessible via a web browser for flexibility
Outlook 2016:
- Classic and familiar interface
- Distinctive ribbon with traditional features
- Time-tested design with a touch of nostalgia
- Desktop application, not browser-based
Accessing Contacts in Outlook 365 and Outlook 2016
Your contacts are like the friends you always want to catch up with. But finding them might be a bit different depending on whether you’re in the hip Outlook 365 neighborhood or the familiar streets of Outlook 2016. Let’s map out the routes so you can easily say hi to your contacts in either version.
Accessing Contacts in Outlook 365:
- Click on the “People” icon at the bottom left.
- Your contacts are all there, ready for a chat.
Accessing Contacts in Outlook 2016:
- Find the “People” tab at the bottom of the screen.
- Your contacts are just a click away.
Overview: Outlook Versions
| Feature | Outlook 365 | Outlook 2016 |
| Interface Design | Sleek and modern design with a streamlined ribbon | Classic and familiar interface with a distinctive ribbon |
| Update Frequency | Regular automatic updates | Periodic updates that might require manual installation |
| Accessibility | Accessible via a web browser for flexibility | Desktop application, not browser-based |
| Collaboration Features | Real-time collaboration with cloud-based sharing features | Collaboration features are limited to local network sharing |
| Integration with Other Apps | Seamless integration with other Microsoft 365 applications | Integration with Microsoft Office suite |
| Learning Curve | Intuitive and user-friendly | Familiar for users accustomed to traditional Outlook layout |
| Customization Options | Extensive customization options for personalization | Limited customization options compared to Outlook 365 |
Customizing Your Distribution List
Dynamic Adjustments: Life is dynamic, and so is your group. Easily adapt by adding or removing friends whenever needed. Think of it as having a flexible guest list for your exclusive gathering.
Grouping for Efficiency: Imagine your contacts as a friendly community. Create a group and add them into subcategories for organized and targeted communication. It’s like arranging different tables at your event for specific interests.
Managing Distribution List Settings
Permissions and Privacy: Want to keep things exclusive? Adjust permissions and privacy settings to control who can send emails to your unique group. It’s like having a thoughtful door policy.
Default Reply Options: Set the tone for your email conversations. Choose default reply options that align with the vibe of your group. It’s like deciding the atmosphere for your virtual meet-up.
Tips and Tricks for Optimal Distribution List Management in Outlook
Tagging with Categories:
Apply tags to your contacts for a well-organized distribution list.
↓
Separate Lists for Different Vibes:
Create distinct lists for various groups, keeping your communication focused and lively.
↓
Regular List Check-Up:
Give your list a periodic review and update to keep it fresh.
↓
Backup Bliss:
Regularly back up your lists to avoid any contact disappearing acts.
↓
Signature Email Styles:
Craft unique email templates for a memorable touch.
↓
Crack the Code of Group Names:
Stick to consistent naming conventions for quick recognition.
↓
Power Up with Contact Details:
Include roles or departments to maximize the potential of your distribution list.
↓
Build a Virtual Hangout:
Encourage engagement within your group for lively interactions.
↓
Spy on Email Success:
Keep an eye on analytics to refine your communication strategies.
↓
Spread the Wisdom:
Share tips on managing email settings with your group for seamless communication.
FAQs: Distribution List in Outlook
Is the process of creating a distribution list the same in Outlook 365 and Outlook 2016?
The process of creating a distribution list shares fundamental principles across Outlook 365 and Outlook 2016. However, variations exist in the user interface. Outlook 365 offers a modern and streamlined approach, while Outlook 2016 adheres to a more classic design. The creation of a distribution list, nonetheless, results in the same outcome, albeit through distinct visual pathways.
Can I import contacts from other sources into my distribution list in both versions?
Of course. Both Outlook 365 and Outlook 2016 provide the capability to import contacts from diverse sources, enhancing the versatility of your distribution list. This functionality enables the effortless integration of contacts originating from diverse sources, thereby enriching the creation of a thorough and consolidated contact database.
Are there any limitations to the number of contacts I can add to a distribution list in Outlook 365 and Outlook 2016?
Both Outlook 365 and Outlook 2016 allow you to add as many contacts as you need. Both versions afford users the flexibility to manage extensive contact lists, fostering inclusivity and accommodating the demands of dynamic communication requirements.
What happens if someone in my distribution list is using a different Outlook version?
Interoperability is a hallmark of Outlook. Regardless of the version disparity between users within a distribution list, seamless communication is maintained. Whether utilizing Outlook 365 or Outlook 2016, the cross-version compatibility ensures that recipients receive communications without impediment, akin to a harmonious multilingual exchange.
Can I share my distribution list between Outlook 365 and Outlook 2016?
Certainly. The capacity to export and import distribution lists facilitates seamless transitions between Outlook 365 and Outlook 2016. This feature ensures that users can effortlessly share and migrate distribution lists, promoting continuity and adaptability across different Outlook versions.
How can I ensure a smooth transition if I upgrade from Outlook 2016 to Outlook 365?
Transitioning from Outlook 2016 to Outlook 365 involves a meticulous and user-friendly process designed to preserve data integrity. Microsoft’s system facilitates a seamless migration, ensuring the preservation and continuity of distribution lists and other critical data during the upgrade process.
Is there a way to merge distribution lists in both Outlook versions?
Certainly. Merging distribution lists necessitates a strategic approach, involving manual consolidation through methods such as copying and pasting or exporting and importing. Both Outlook 365 and Outlook 2016 provide users with the tools required to execute this operation effectively, fostering the amalgamation of distinct distribution lists.

Link Masking Guide – Everything To Know About Hiding Domain & URLs

How to Add Signature in Outlook: Step-by-Step Guide

How to Install deb File in Ubuntu using Terminal and GUI?
About Author
KemuHost Team
We are a team of Web Hosting Experts with decades of experience in Server Management and Web Hosting fields. We do perform thorough research on the web hosting trends and provide the best information to our users.