How To Install ClamAV Plugin From WHM?
ClamAV is one of the most popular open-source antivirus plugins, available for free for WHM servers. ClamAV allows individual cPanel users to scan their home directories and emails against malicious files. This article will help you with the steps to install ClamAV plugin from WHM.
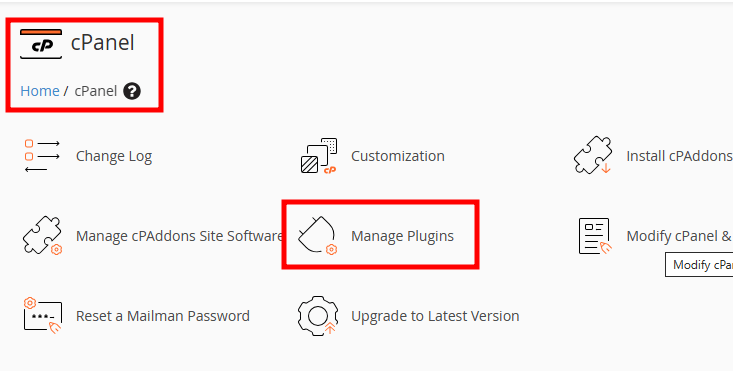
- Log in to the WHM with the root user.
- Under the cPanel section, select the Manage Plugins option.
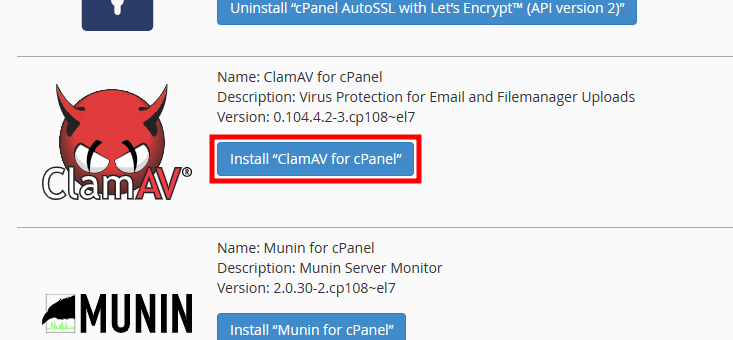
- Click on Install ClamAV for cPanel. It will start to install and may take a few minutes. Don’t close the web browser until the installation process completes.
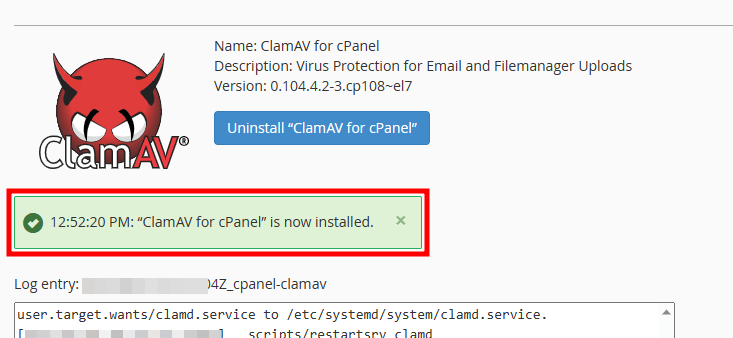
- Once the installation is over, you’ll receive a ClamAV for cPanel is now installed message.
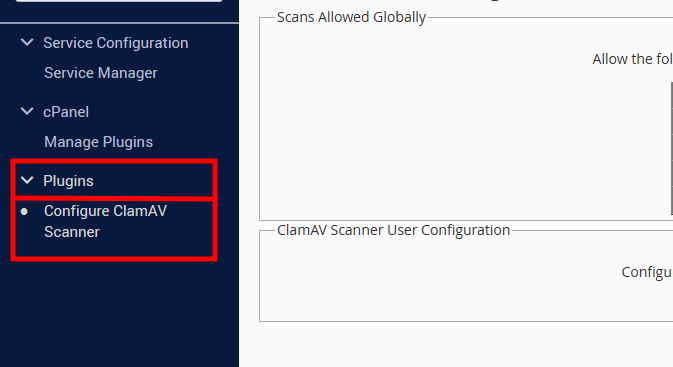
- Under the Plugins section, select Configure ClamAV Scanner option.
- At this stage, you can set the global scan permissions. If you want to allow the cPanel users to scan their files and folders, then check the boxes mentioned below.
- Scan Entire Home Directory: Scans Server home directory
- Scan Mail: Scans server mail folders
- Scan Public FTP Space: Scans all FTP folders user can access
- Scan Public Web Space: Scans all folders that web visitors can access
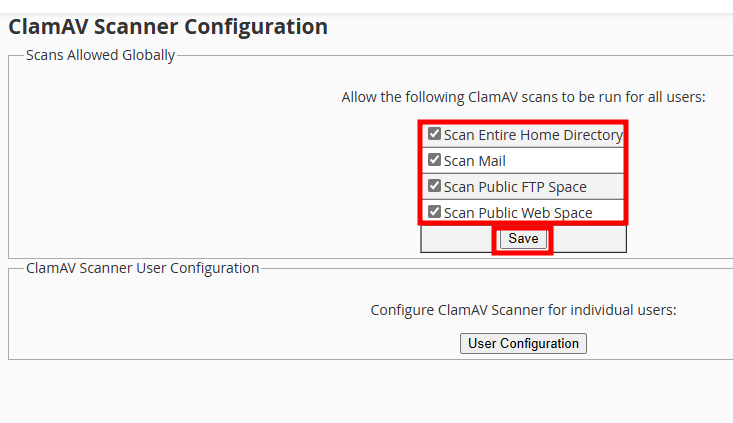
- Click on the Save button to apply the changes.
Note: It is recommended to have at least three Gigabytes (GB) of RAM on the server to run ClamAV. Your server may face performance issues due to a scarcity of RAM when you run ClamAV.
ClamAV should be run daily by scheduling a root cron job during off-peak hours of your server usage.
That’s It! Install ClamAV plugin and secure your server for free.

How To Disable AWStats From WHM?

How To Create And View Phpinfo File In cPanel?

How To Download MySQL Database Backup From cPanel?
About Author
KemuHost Team
We are a team of Web Hosting Experts with decades of experience in Server Management and Web Hosting fields. We do perform thorough research on the web hosting trends and provide the best information to our users.