How to Add a Shopping Cart to WordPress
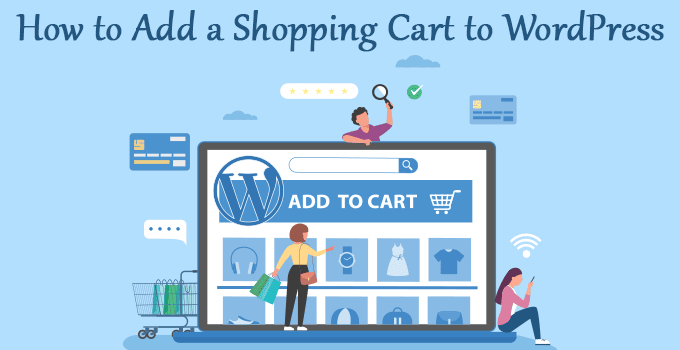
Are you planning to add a shopping cart to WordPress site but do not have coding knowledge? Well, don’t worry. You do not need coding experience to launch the shopping cart.
When running your website with WordPress, plenty of free eCommerce plugins allow you to add a shopping cart to your website. One of the best eCommerce plugins for WordPress is WooCommerce. It is an all-in-one eCommerce solution; you can create a powerful, managed online store.
Benefits of WooCommerce

There are so many plugins available with WordPress to launch the eCommerce Store. But, to add a shopping cart to WordPress, we recommend using WooCommerce. There are certain benefits, of course.
1) Open Source:
WooCommerce is an open-source plugin built on well-known CMS WordPress, so you have complete control over your web store. You can customize any functionality for your unique and custom business requirements. Since it is an open-source plugin, you do not need to pay anything for this plugin.
2) Custom Functionality:
WooCommerce has many plugins available to support your unique eCommerce business needs, thanks to its great developers’ community. You can easily customize the plugin and add new functionality without much effort.
3) Easy & Effective Design:
WooCommerce can work with almost any WordPress theme so that you can select a theme per your design choice, and WooCommerce can work with it.
4) Easy to Use:
Same as WordPress, WooCommerce is user-friendly. Its admin interface is quite similar to WordPress. Even if you face any issues, you can find many how-to tutorials to deal with any issue.
5) Sell Any Products:
With WooCommerce, you can sell physical and digital products. For example, you can build a membership site, make appointments, make online bookings, and sell subscription-based products.
6) Integration Capabilities:
WooCommerce is flexible when integrating any third-party software system with your webshop. For example, you can integrate a CRM system, order management tools, and third-party shipping services with the WooCommerce store.
7) SEO Friendly:
WordPress is the best platform for SEO, and WooCommerce runs on WordPress, so that you can get advantages of this SEO-friendly platform. WooCommerce SEO requires consistent efforts, but with WordPress/WooCommerce, it is easy to optimize your website for SEO.
8) Analytics Power:
WooCommerce has in-built analytics to help you get valuable data about your eCommerce store without extra effort. You can get the total sales statistics by date, average order value, individual customer shopping state, and much more.
9) Great Security:
It is crucial to provide customers with a secure shopping experience when they purchase from your website. WooCommerce is highly secure because of its regular updates. The team of WooCommerce regularly works with the leading security experts in the industry to constantly monitor the code base for any vulnerabilities and release the required updates.
Installing WordPress

We assume that you already have a registered domain and a hosting account. If you need some domain registration and hosting plan selection guidelines, you may refer to our guide on How to Start a Blog Quickly.
Most of the control panels have an option for One Click Installation. Using this option, you can easily install WordPress for your domain without technical effort. But, if you do not see this option, you can refer to the below steps for manual installation.
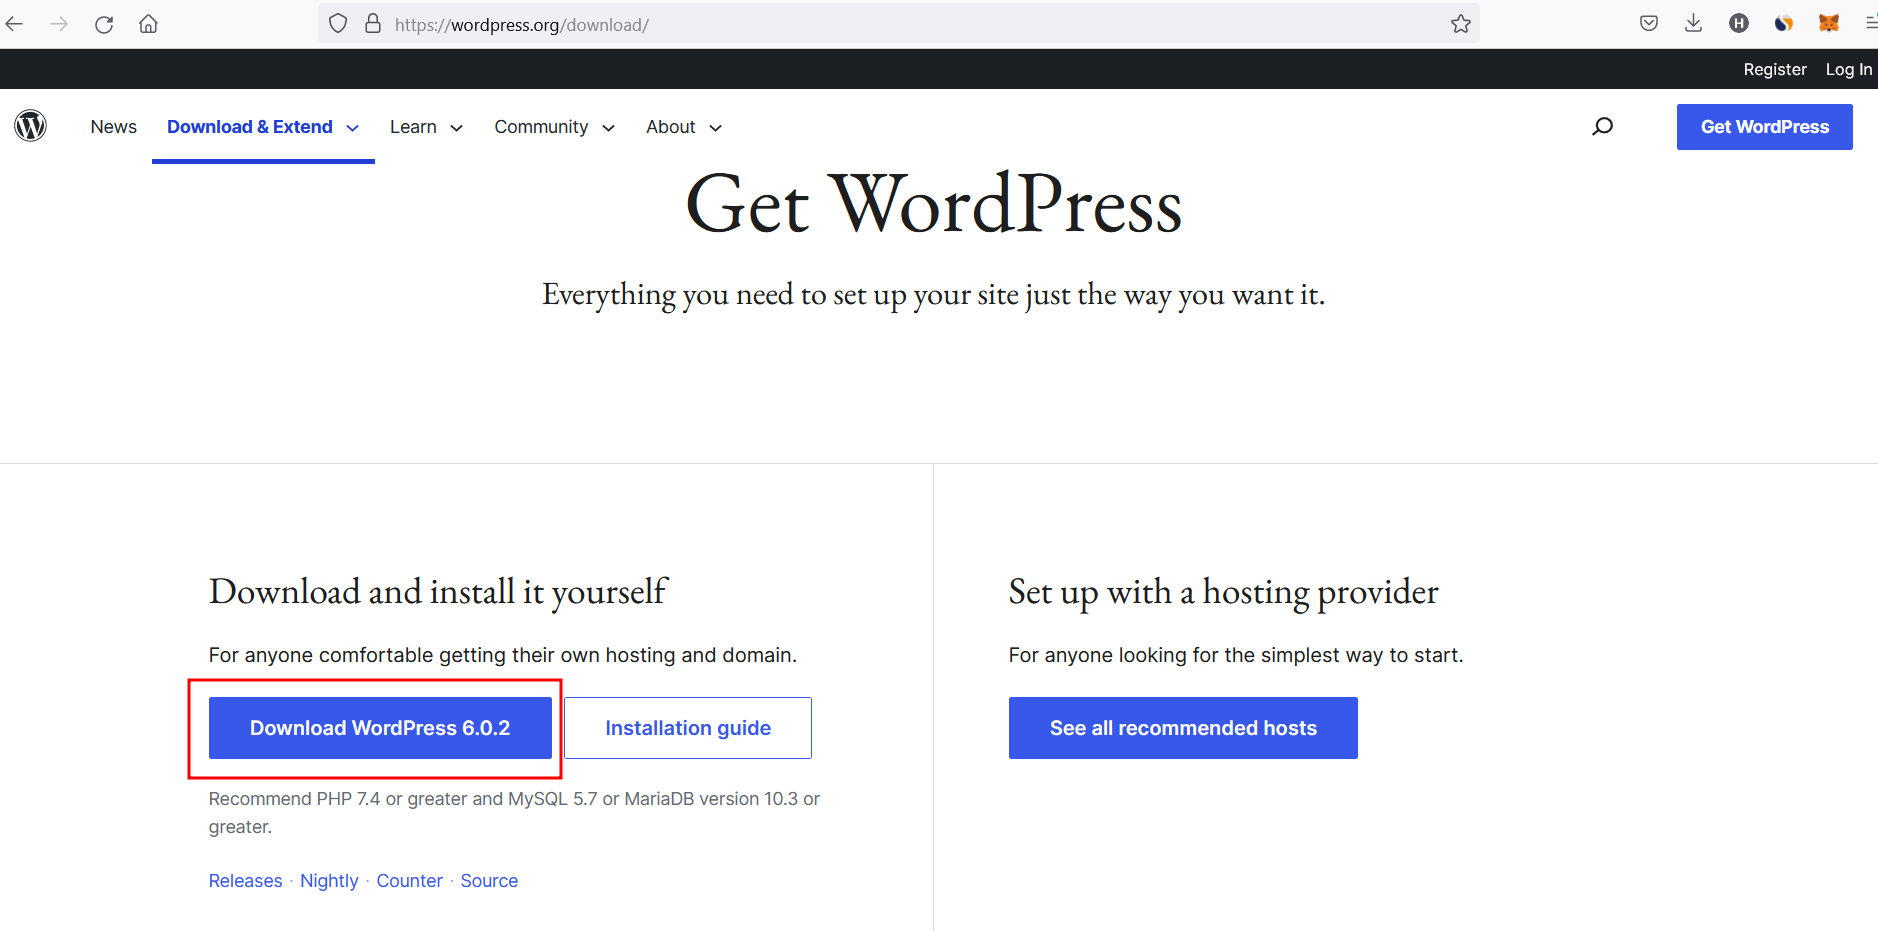
1: Download the latest WordPress zip file.
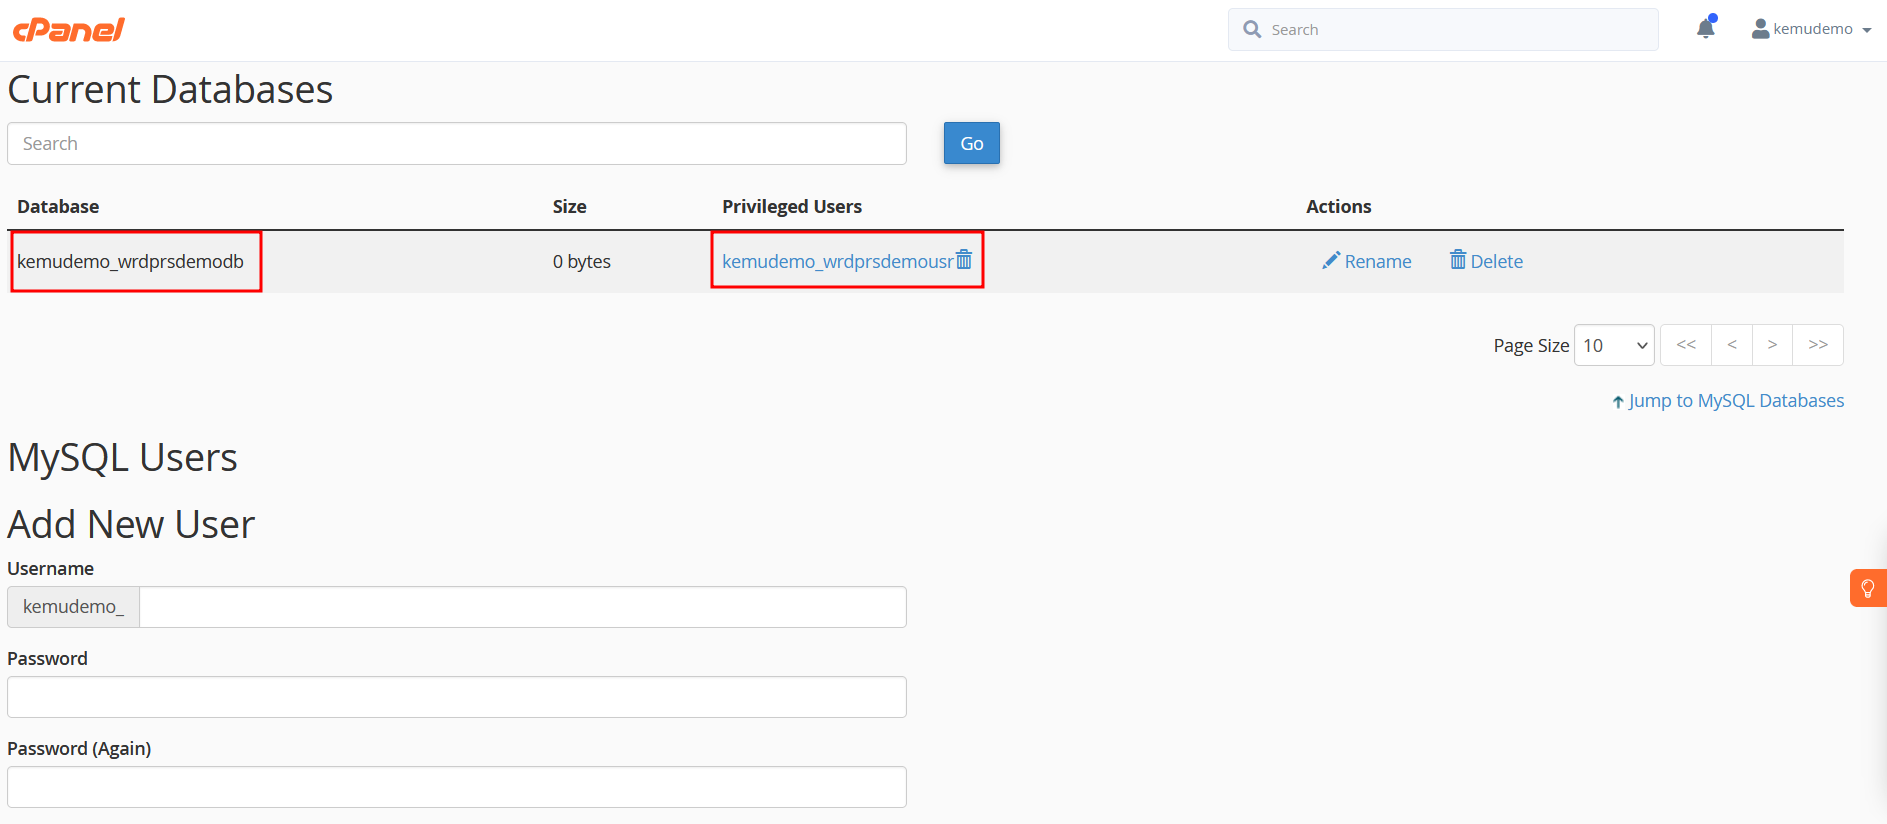
2: Create an empty database and associate a database user from your control panel. Keep these details in a safe place. We will use it during the setup.
3: Upload the WordPress zip file from the File Manager/FTP Account.
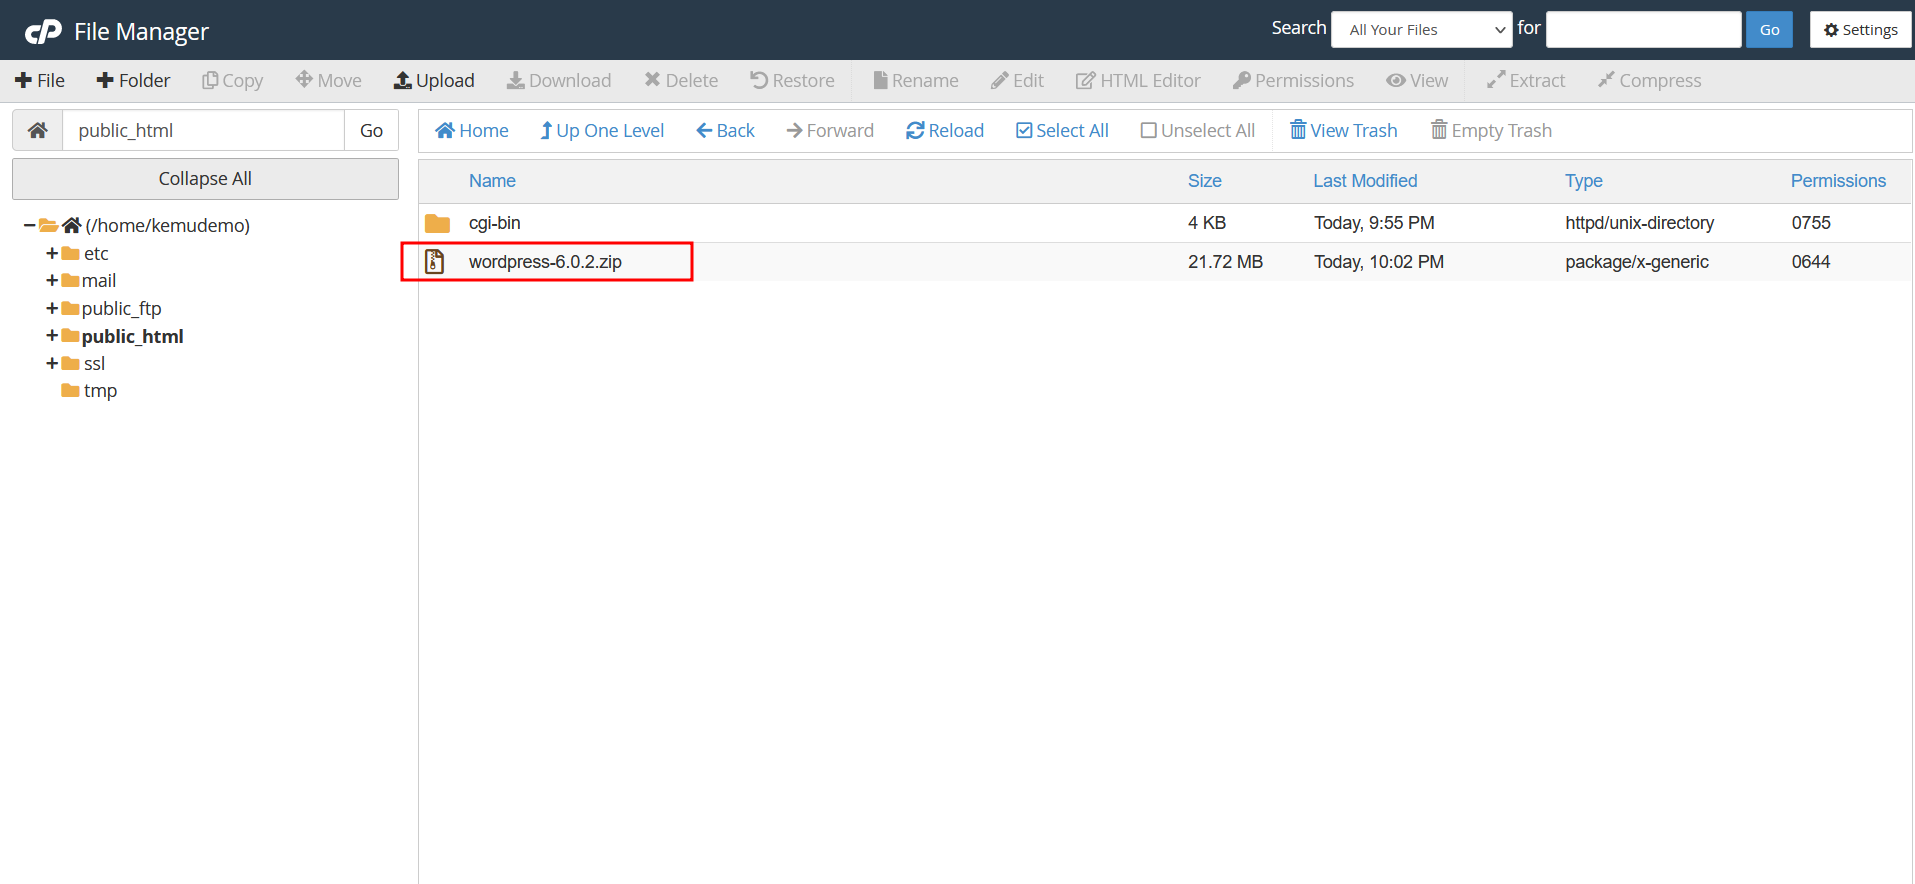
4: Now, let’s extract the file in the public_html directory.
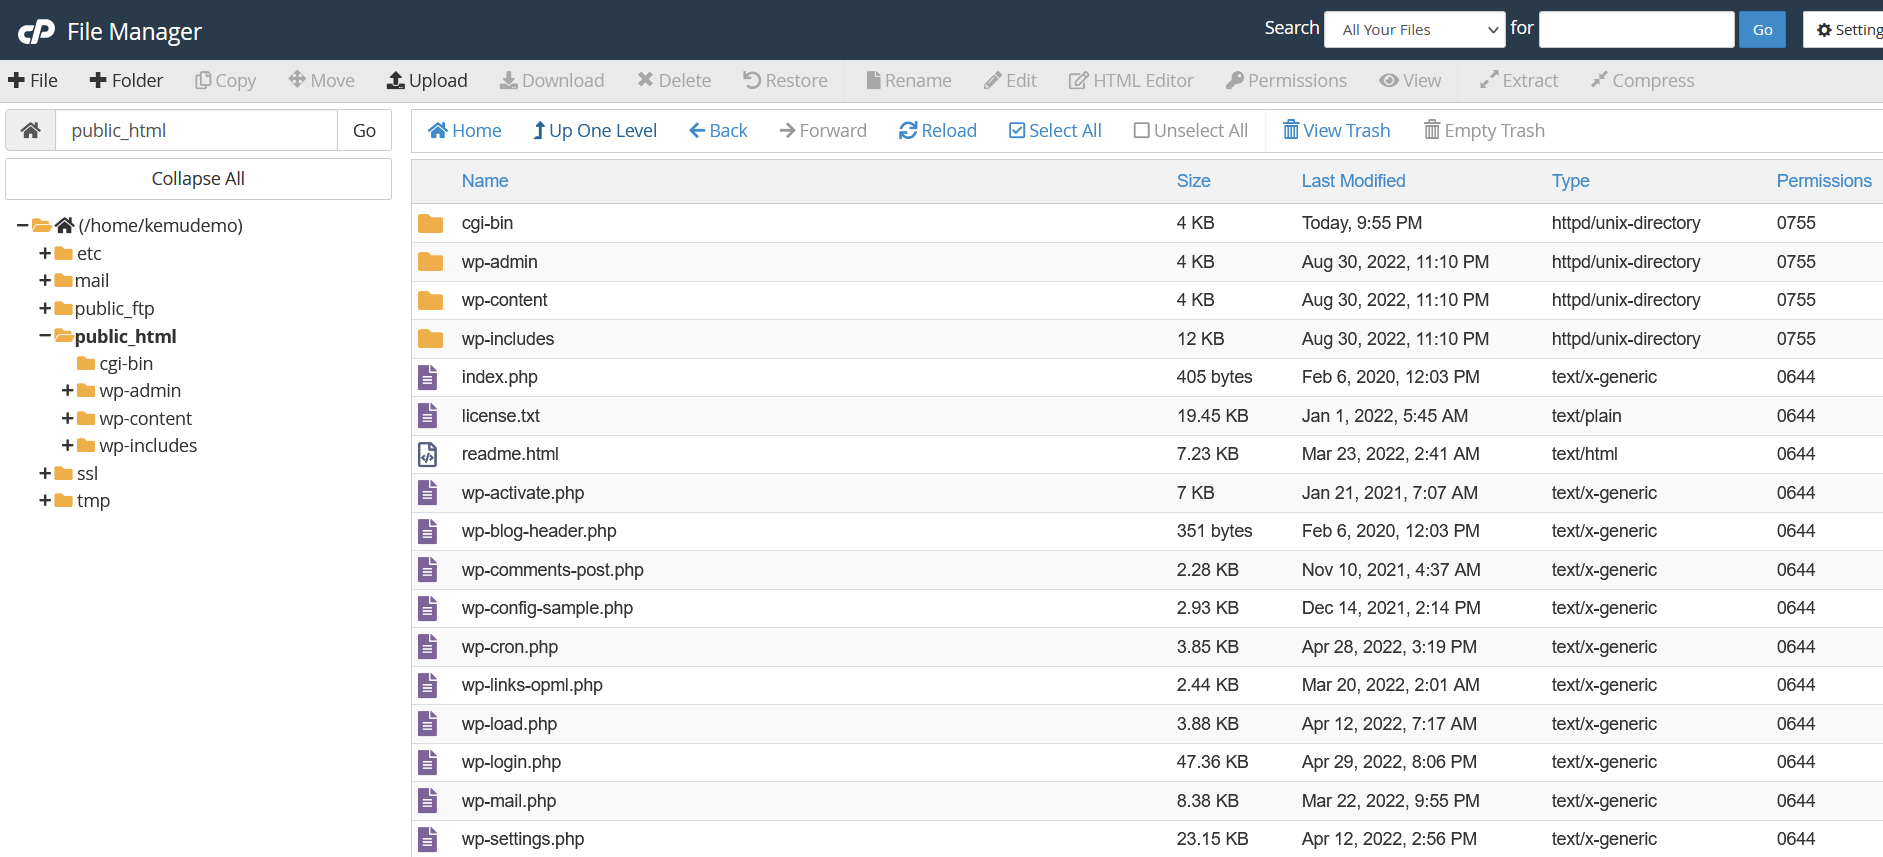
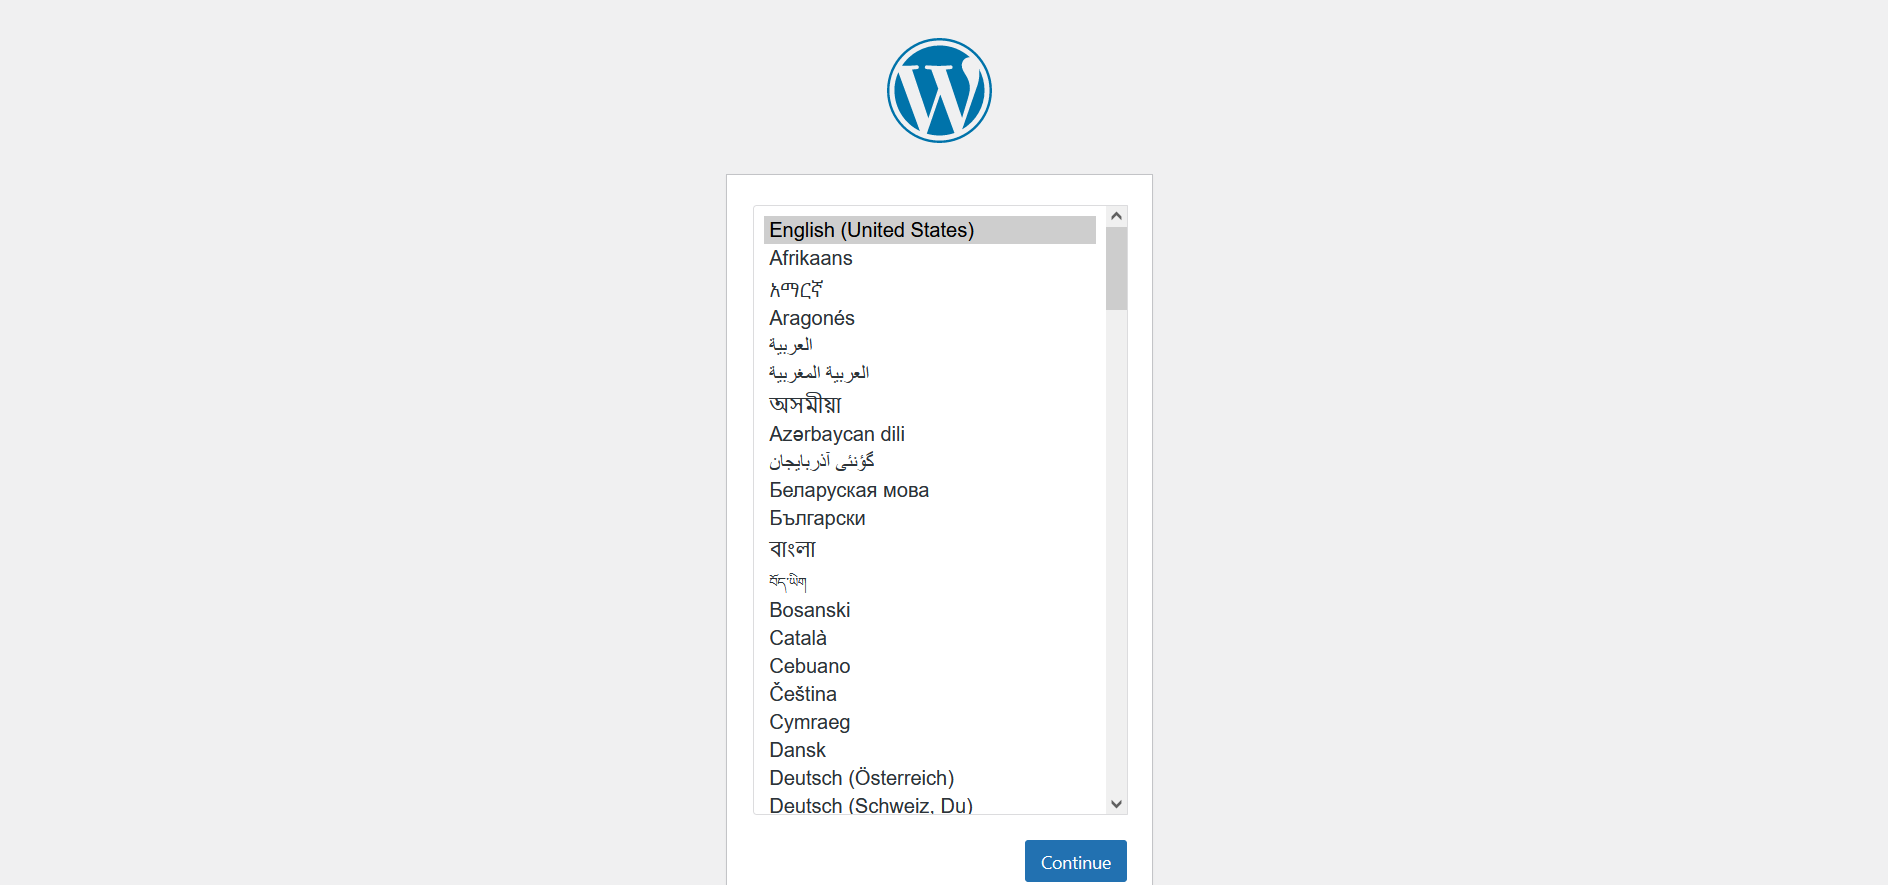
5: You can now browse your domain from any internet browser. You will see the WordPress setup page. Select the language of your choice and click on Continue.
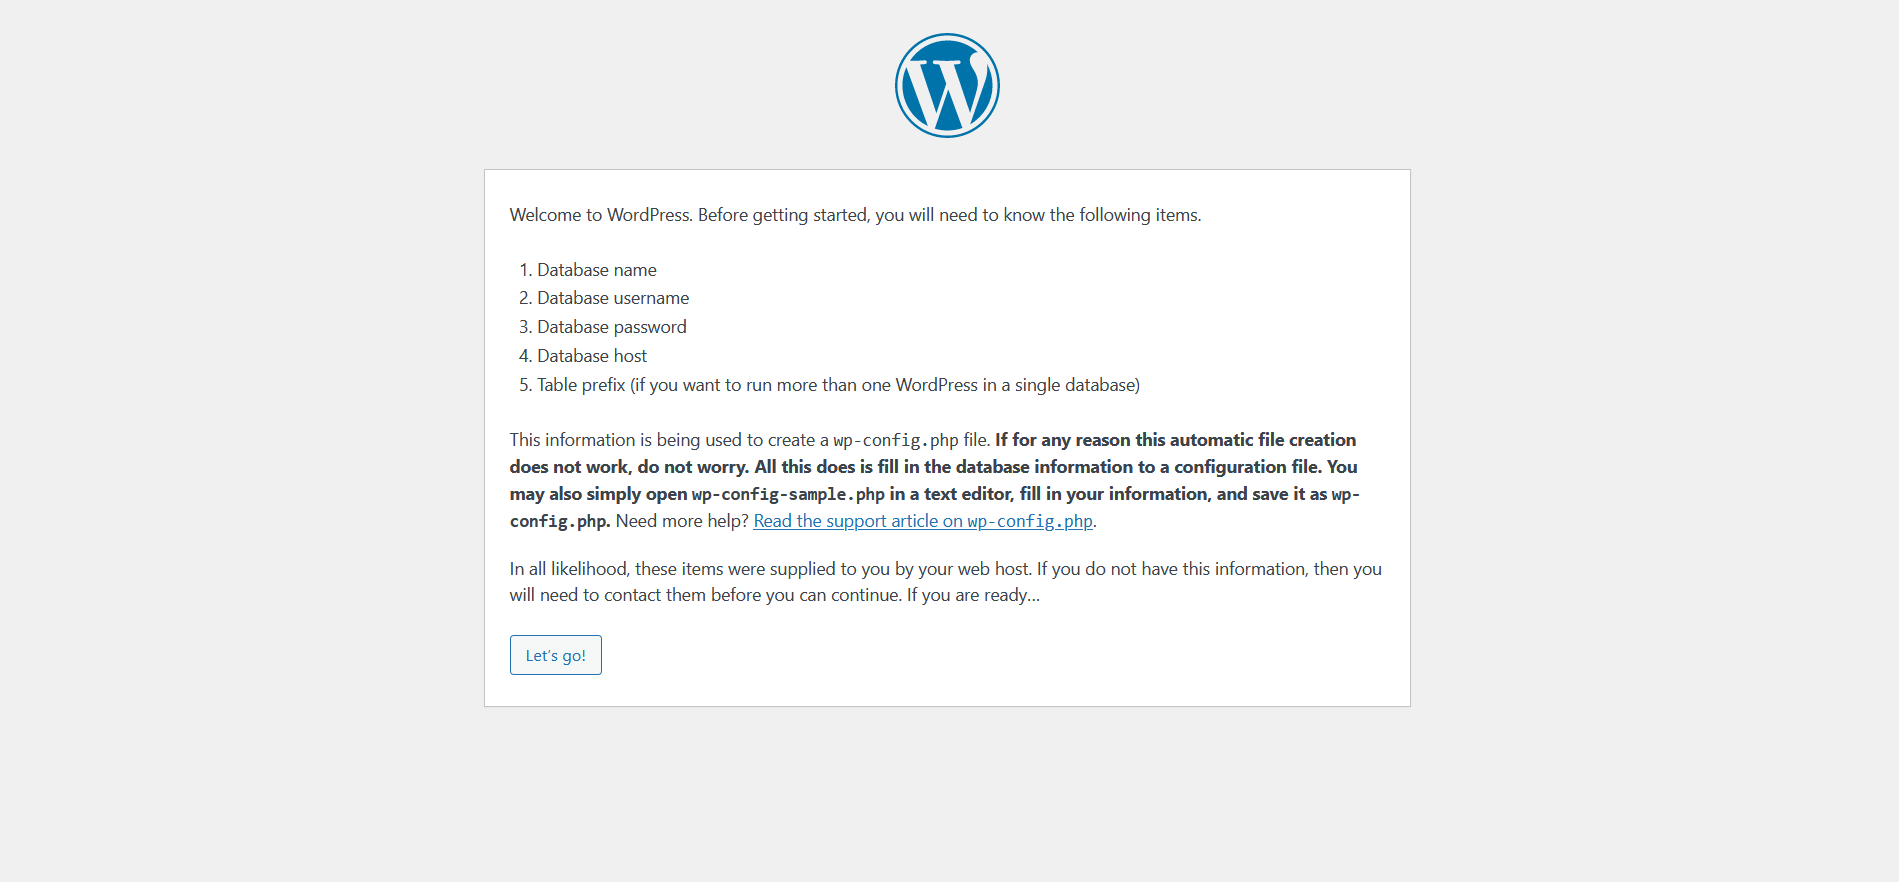
6: The setup will ask you to confirm the details. Click on Let’s Go! Button.
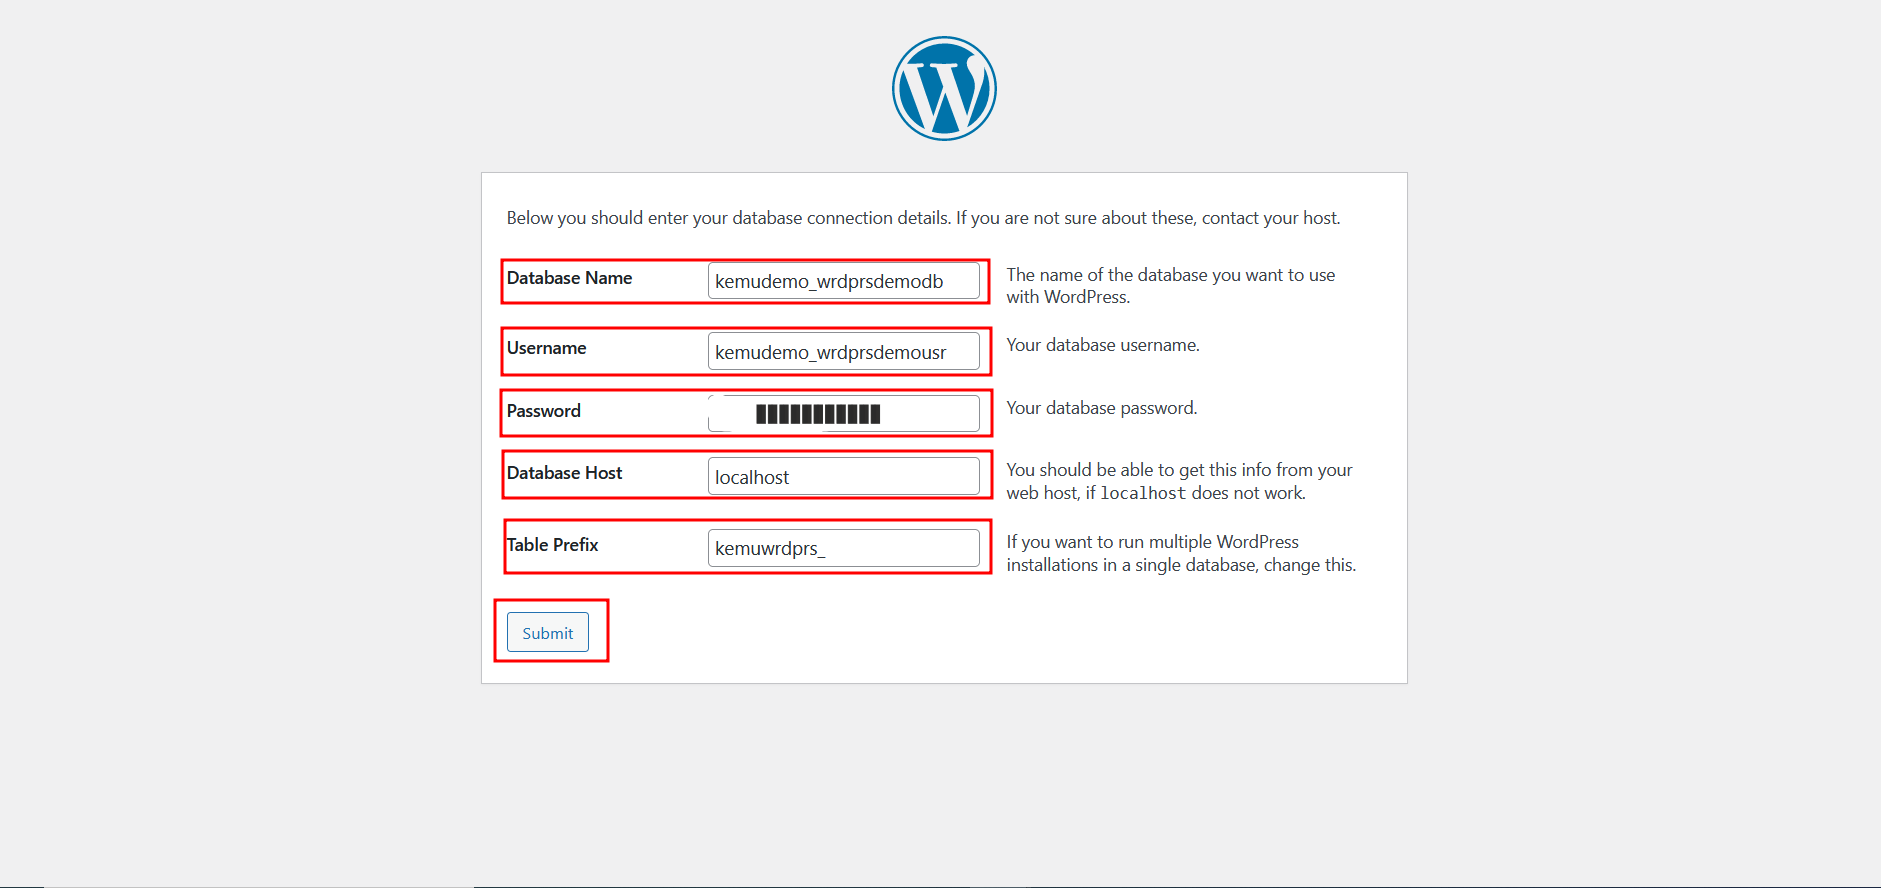
7: Enter the database details we have created in Step 2. In “Database Host,” you can enter ‘localhost’ until you are not using any remote database. In “Table Prefix,” enter any random prefix for tables. See the following screen capture for more details. In the next step, Run the Installation.
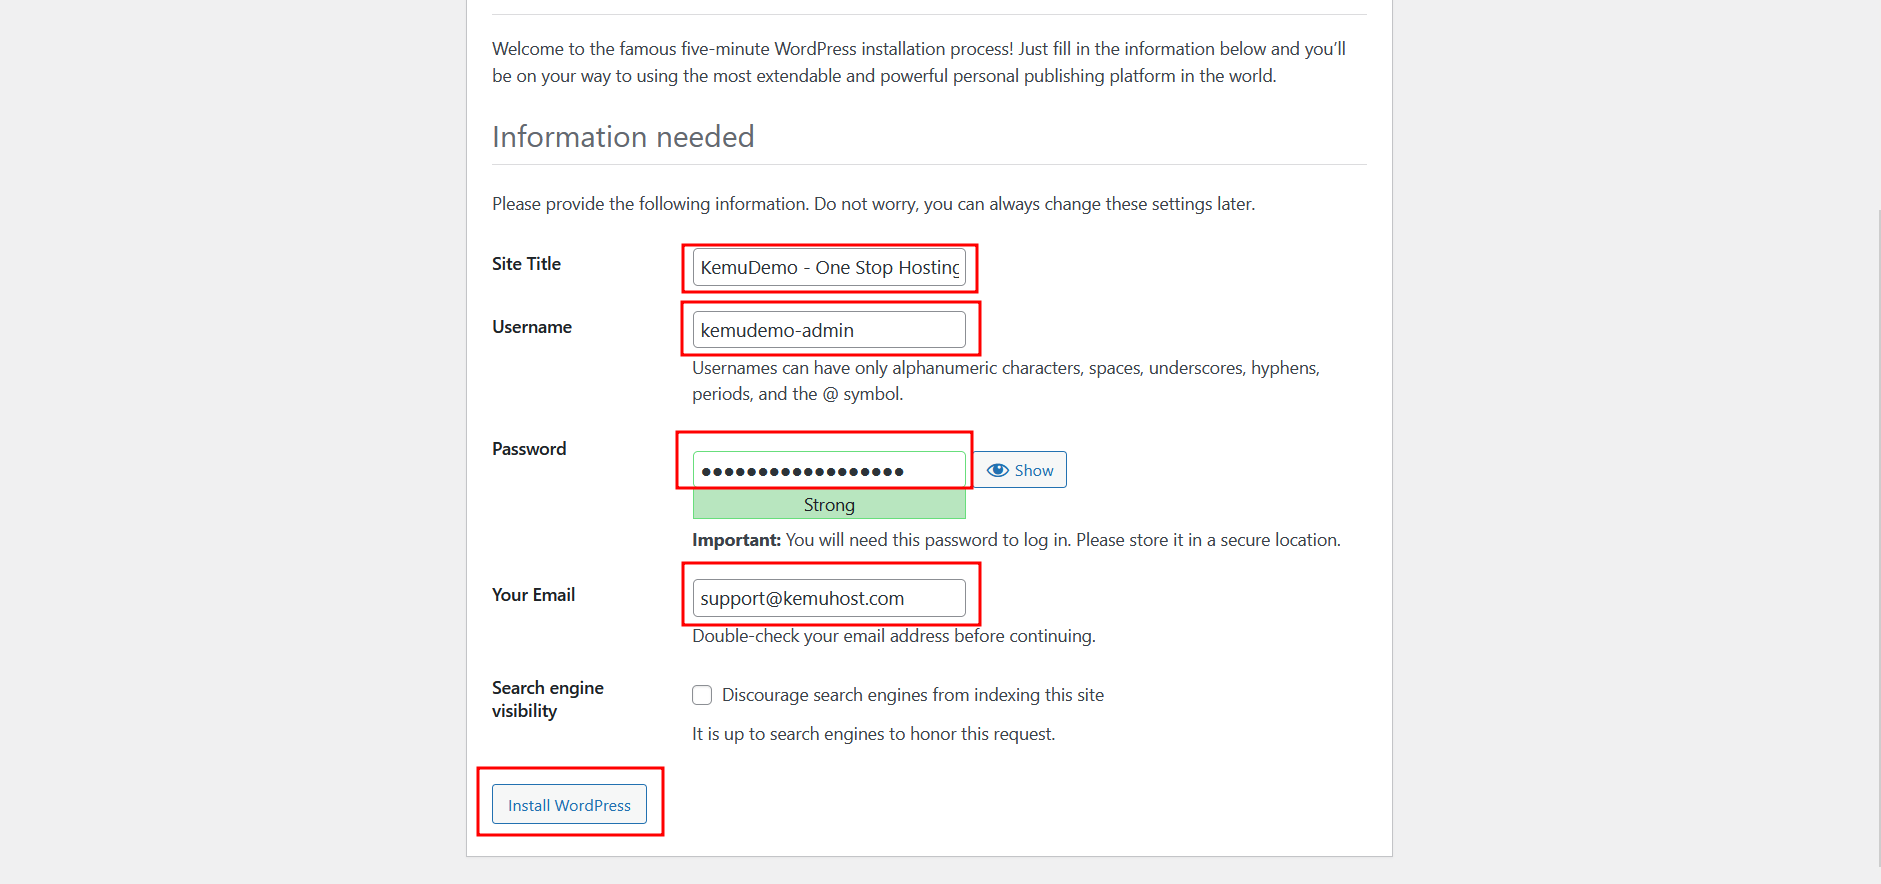
8: On the next page, enter the Title for your store site, Username and password for the WordPress Admin area, and your email address, and click on Install WordPress.
9: You will see the success message and the screen to log in to your WordPress Admin Area.
You will now see the default WordPress theme when you browse the domain. You can log in to your WordPress admin area and install the theme related to your store. Add content, images, etc. We will now see how to install WooCommerce and add the products for your store.
Installing WooCommerce
WooCommerce is the most popular, secure, yet free eCommerce plugin. We now have WordPress installed for our website. So let us check out the steps to install and configure WooCommerce for your WordPress Store.
1: Log in to your WordPress Admin Area (https://www.yourdomain.com/wp-admin)
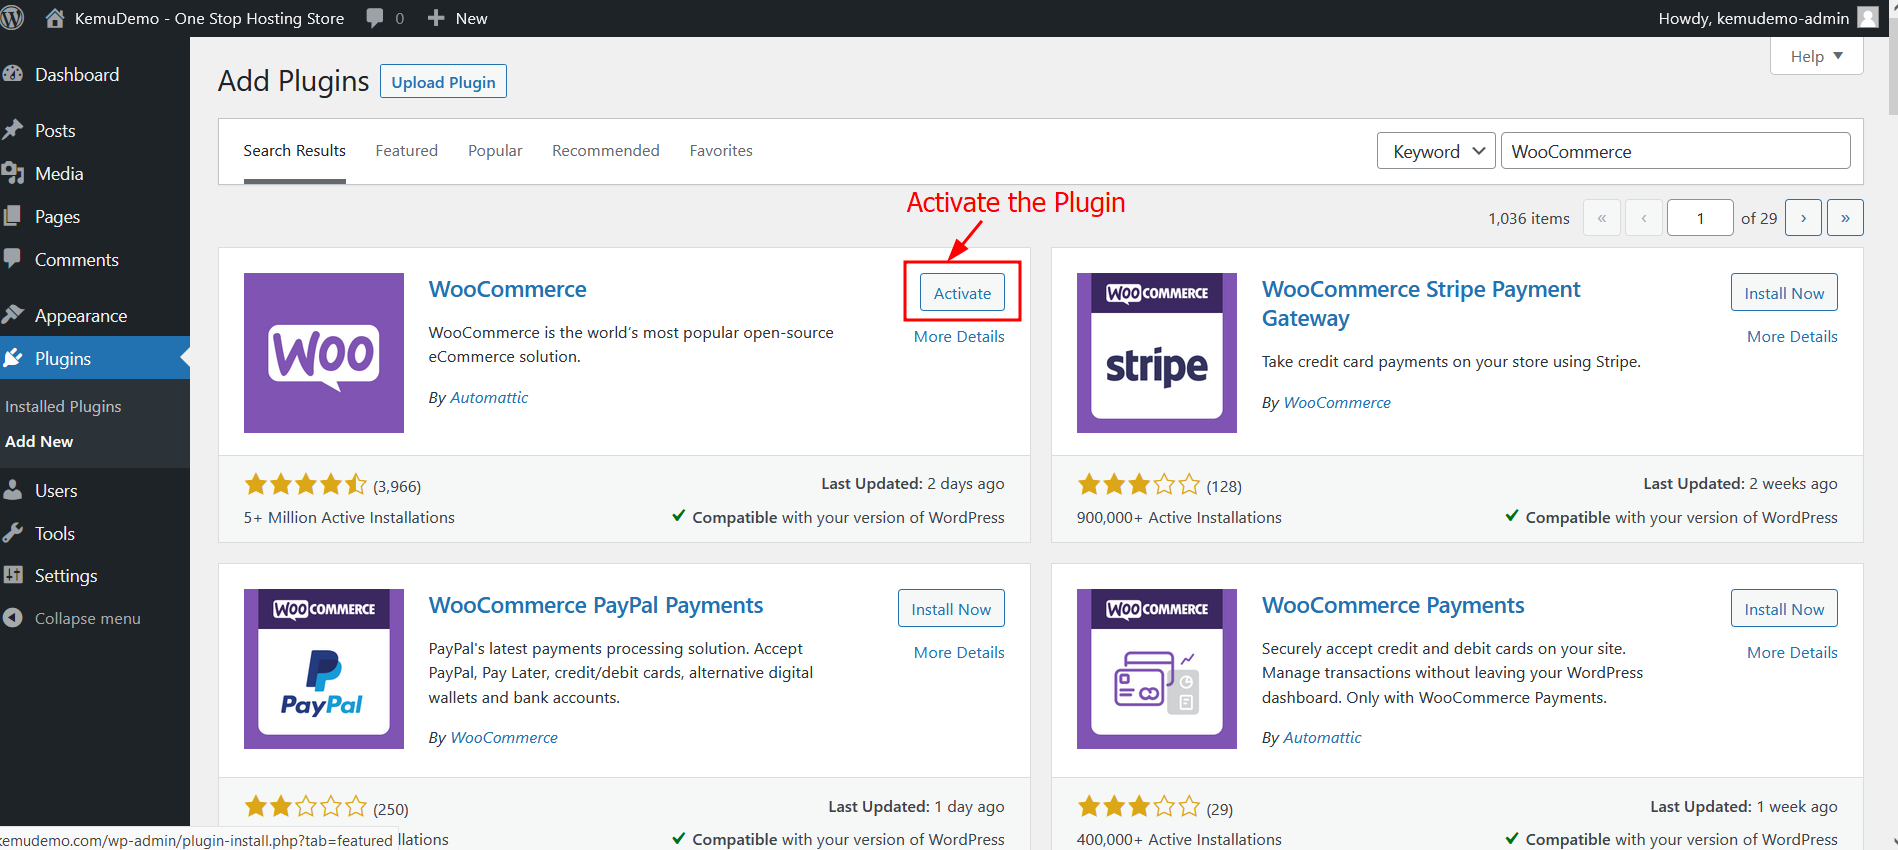
2: Go to Plugins ⇒ Add New ⇒ Search “WooCommerce” ⇒ Click on Install Now.
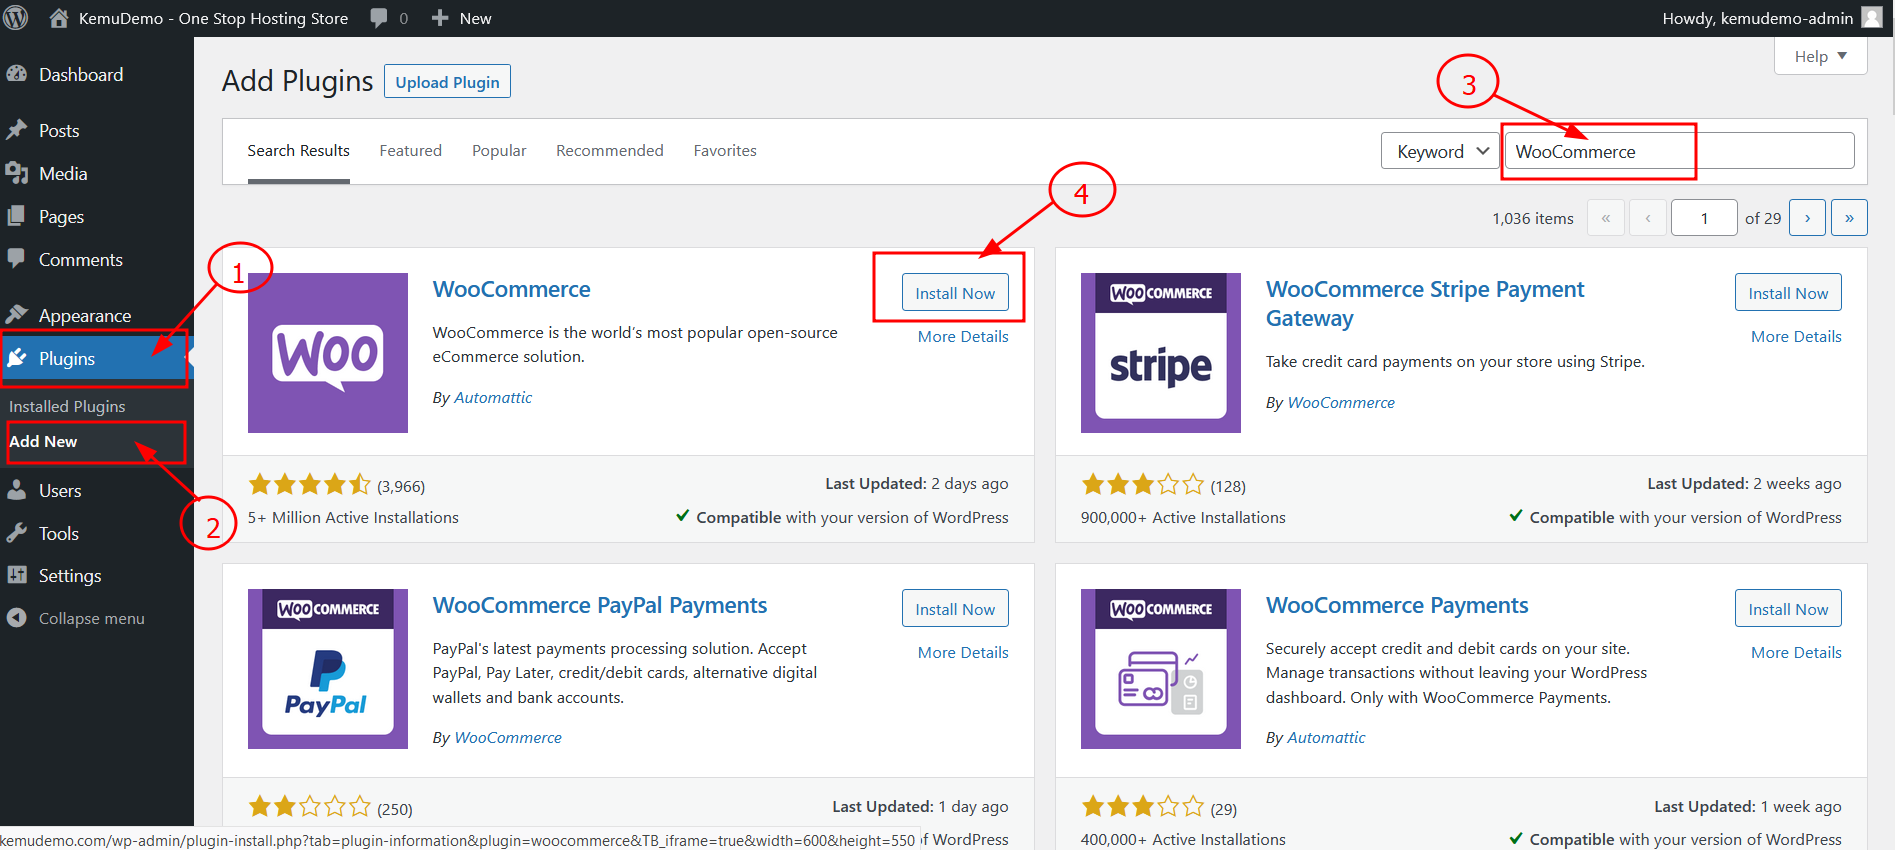
3: Once the installation completes, click on Active to activate the WooCommerce plugin.
Configuring WooCommerce
Once you have installed and activated the WooCommerce plugin, we will now configure it.
1: From your WordPress Admin Area, navigate to WooCommerce ⇒ Home. You will see the WooCommerce Setup Wizard.
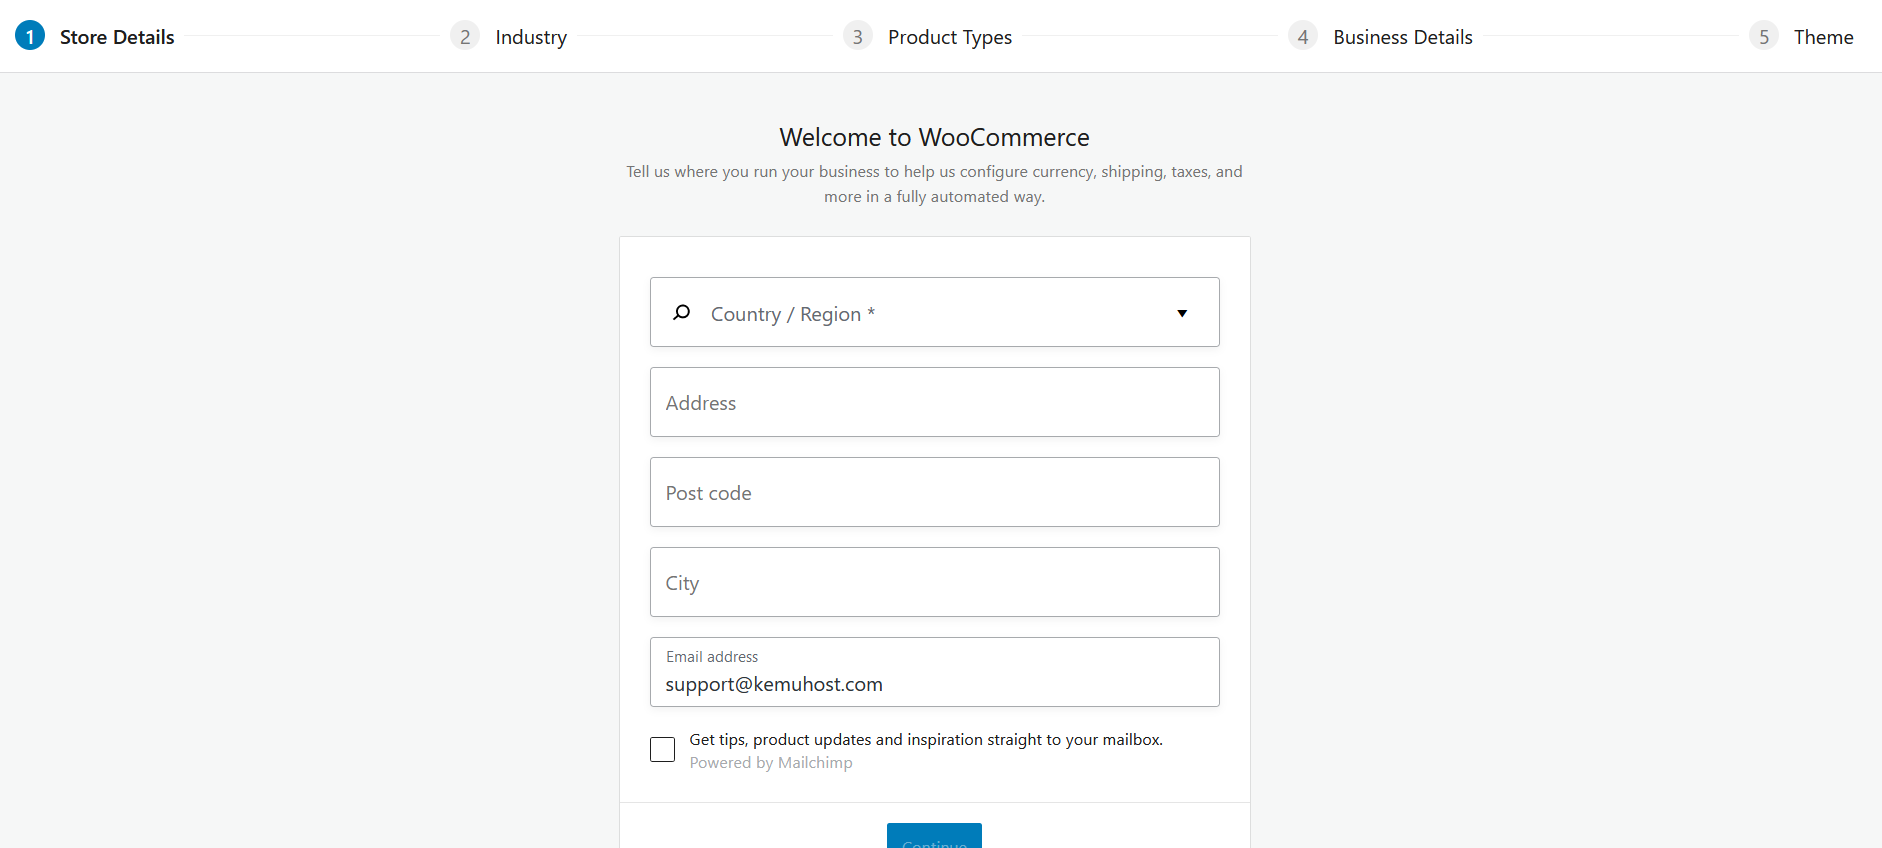
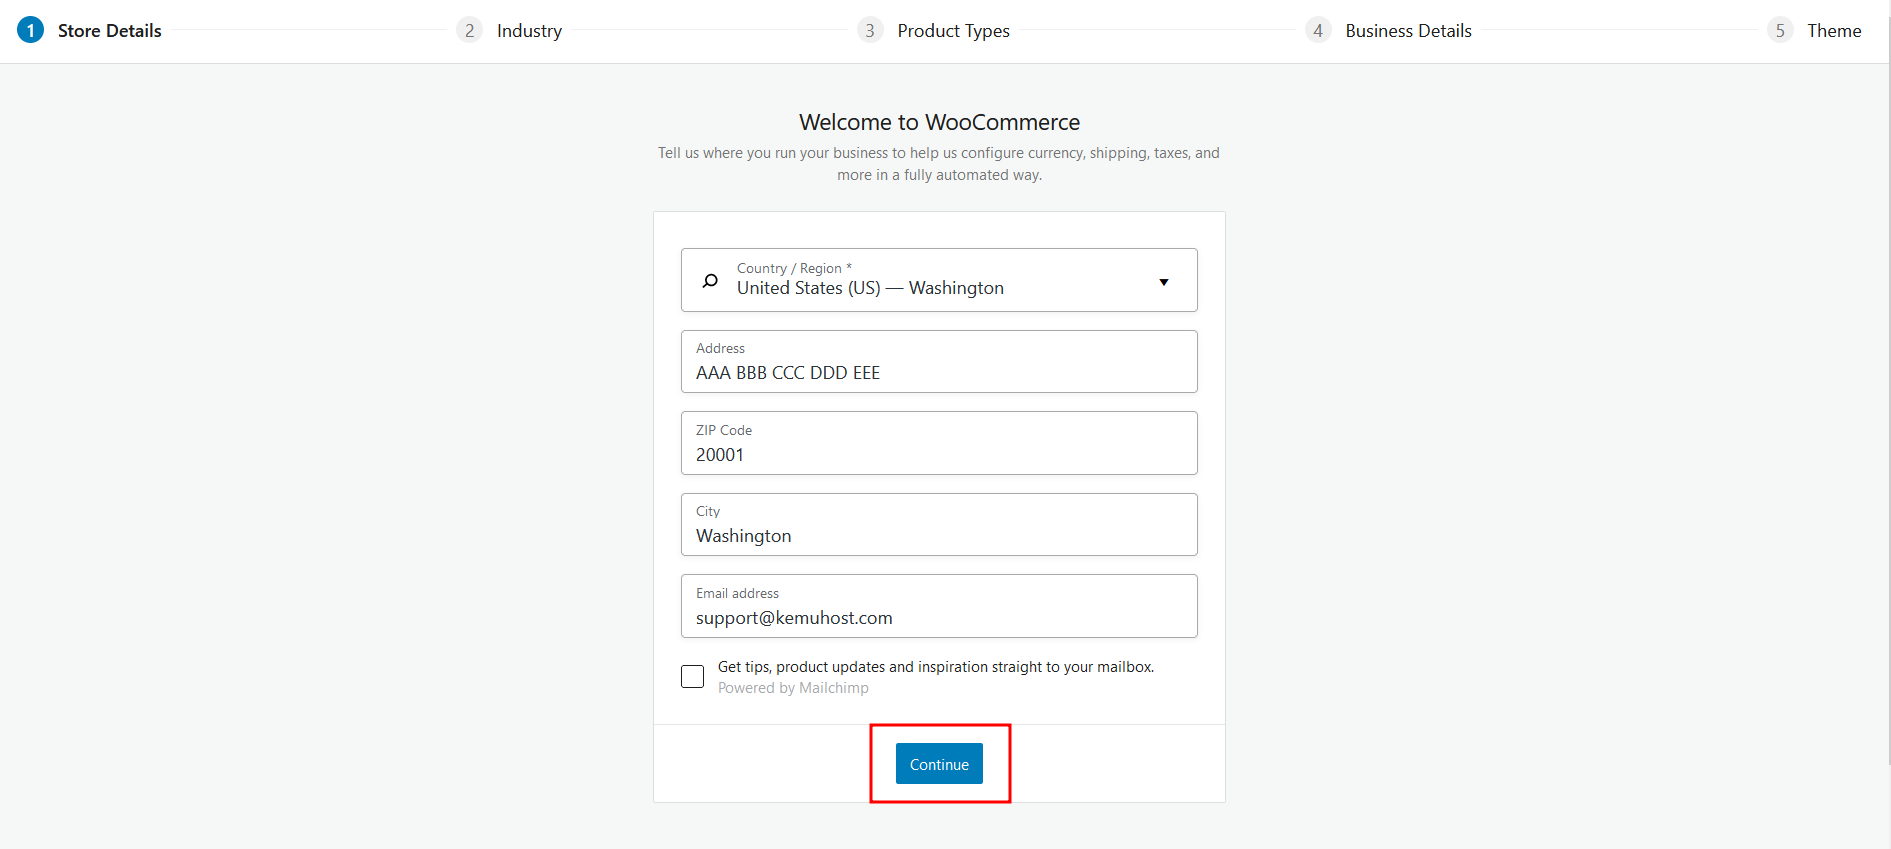
2: In Store Details, Enter your country, Address, postcode, city, and email address. Once you are done, click on the Continue button.
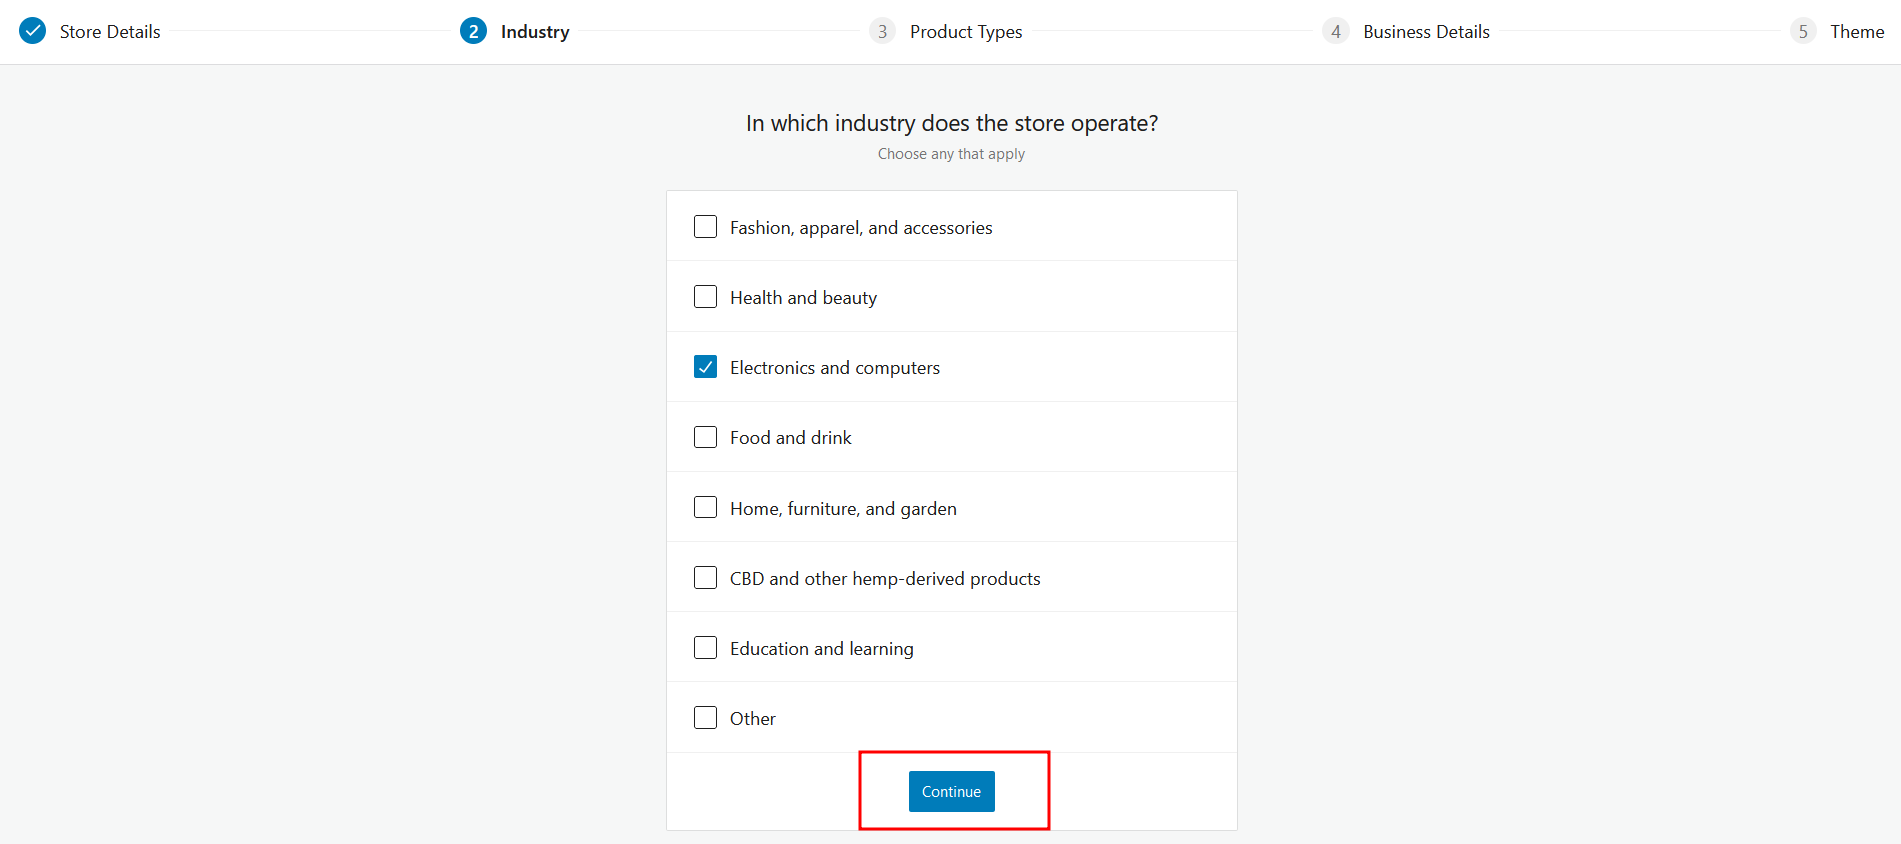
3: In Industry, select the relevant Industry and click on the Continue button.
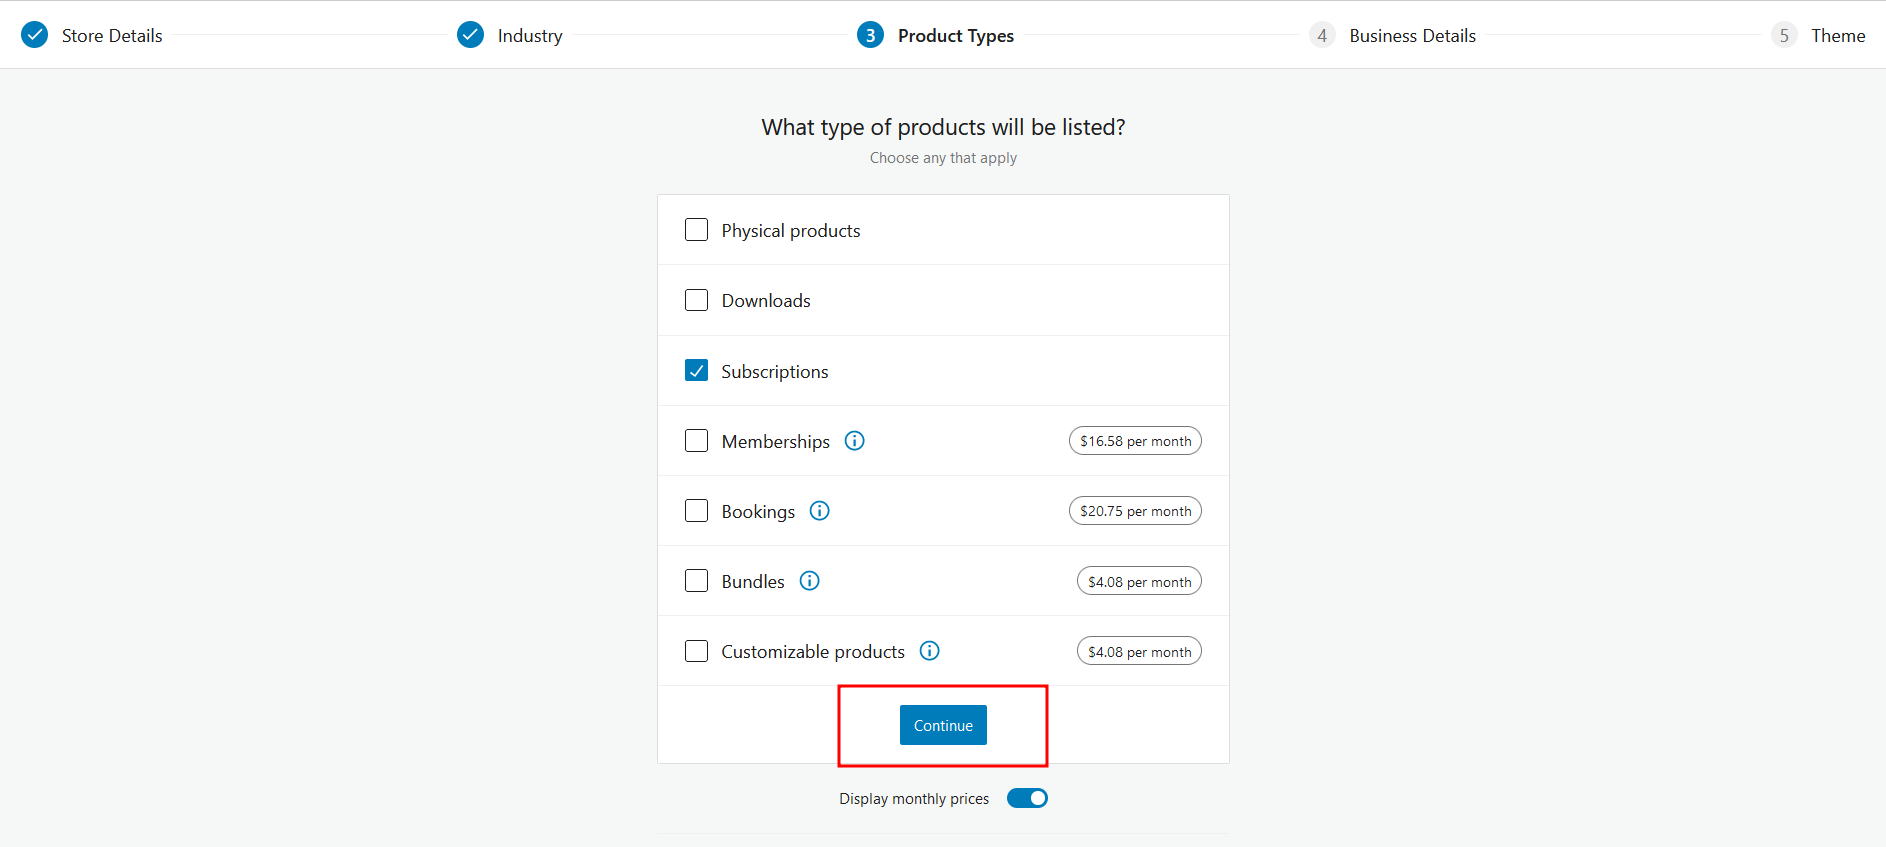
4: In Product Types, select the product(s) you are willing to sell and click on the Continue button.
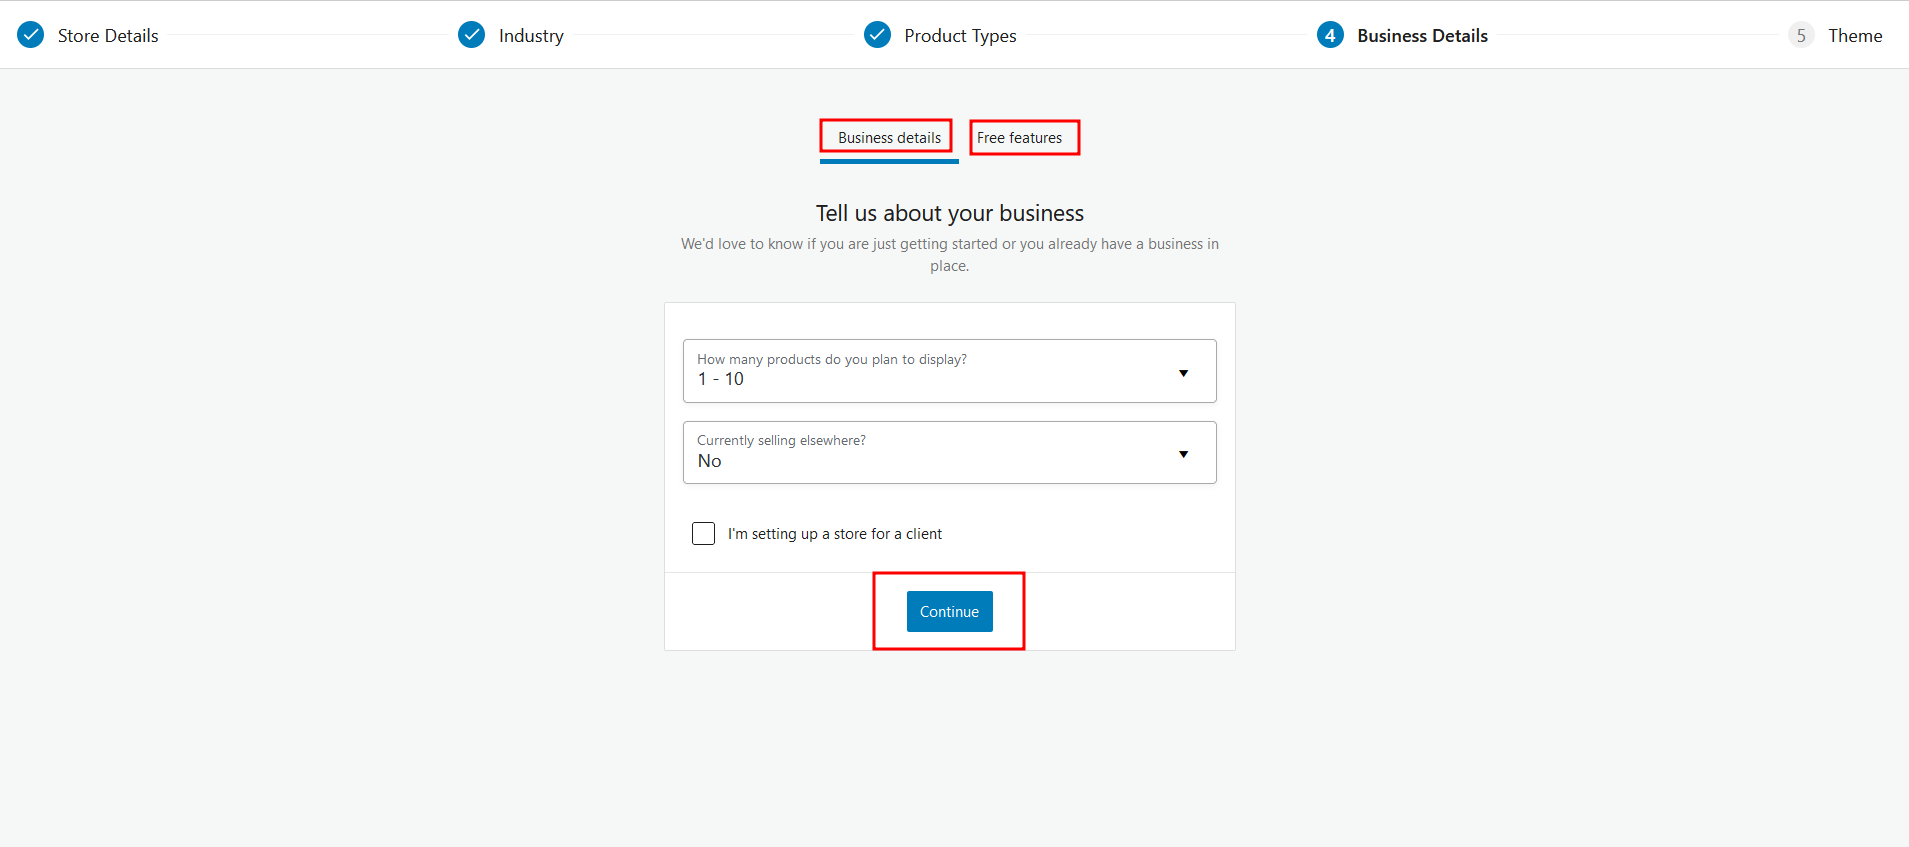
5: In Business details, enter the requested Business Details and Free features (if any). Once done, click on the Continue button.
6: In Theme, you can select the Theme that best suits your business. If you have already activated another theme, you can skip this step. You can also see a live demo of the Theme.

Add Products

So far, we have done the basic configuration of our WooCommerce plugin. We will now add our products to the store.
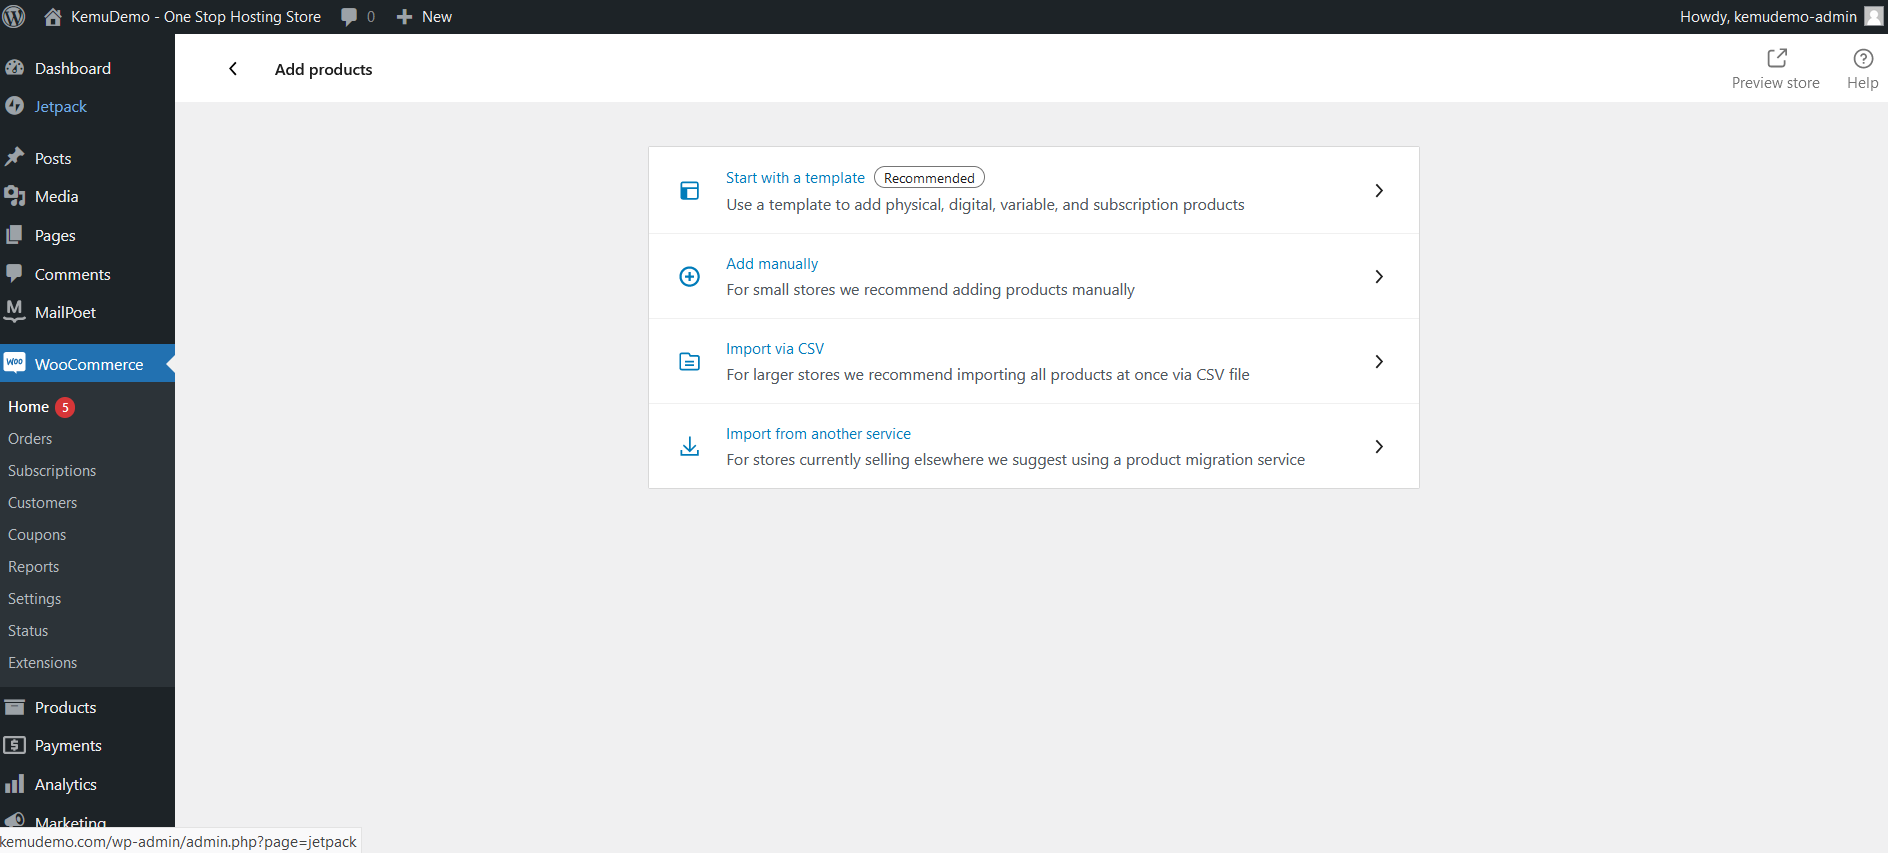
1: From your WordPress Admin Area, navigate to WooCommerce ⇒ Home ⇒ Add products.
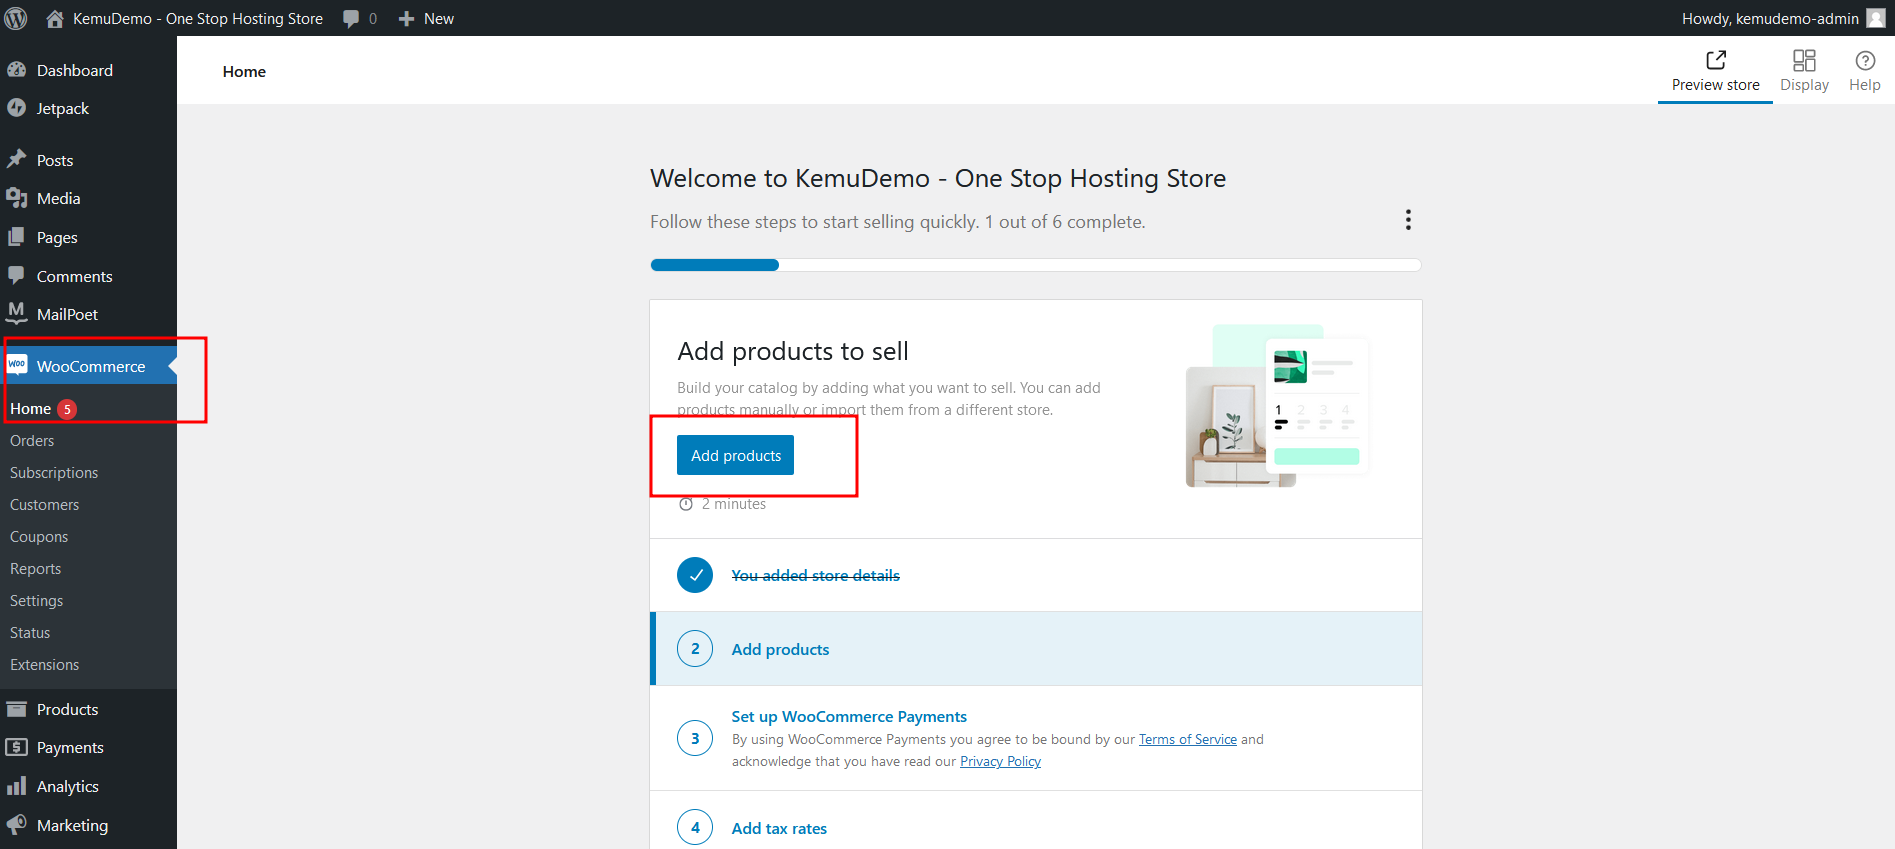
2: You will have four different options: (1) Start with a template (Use a template to add physical, digital, variable, and subscription products), (2) Add Manually (For small stores, we recommend adding products manually), (3) Import via CSV (For larger stores we recommend importing all products at once via CSV file), and (4) Import from another service (For stores currently selling elsewhere we suggest using a product migration service). Select the appropriate option and proceed.
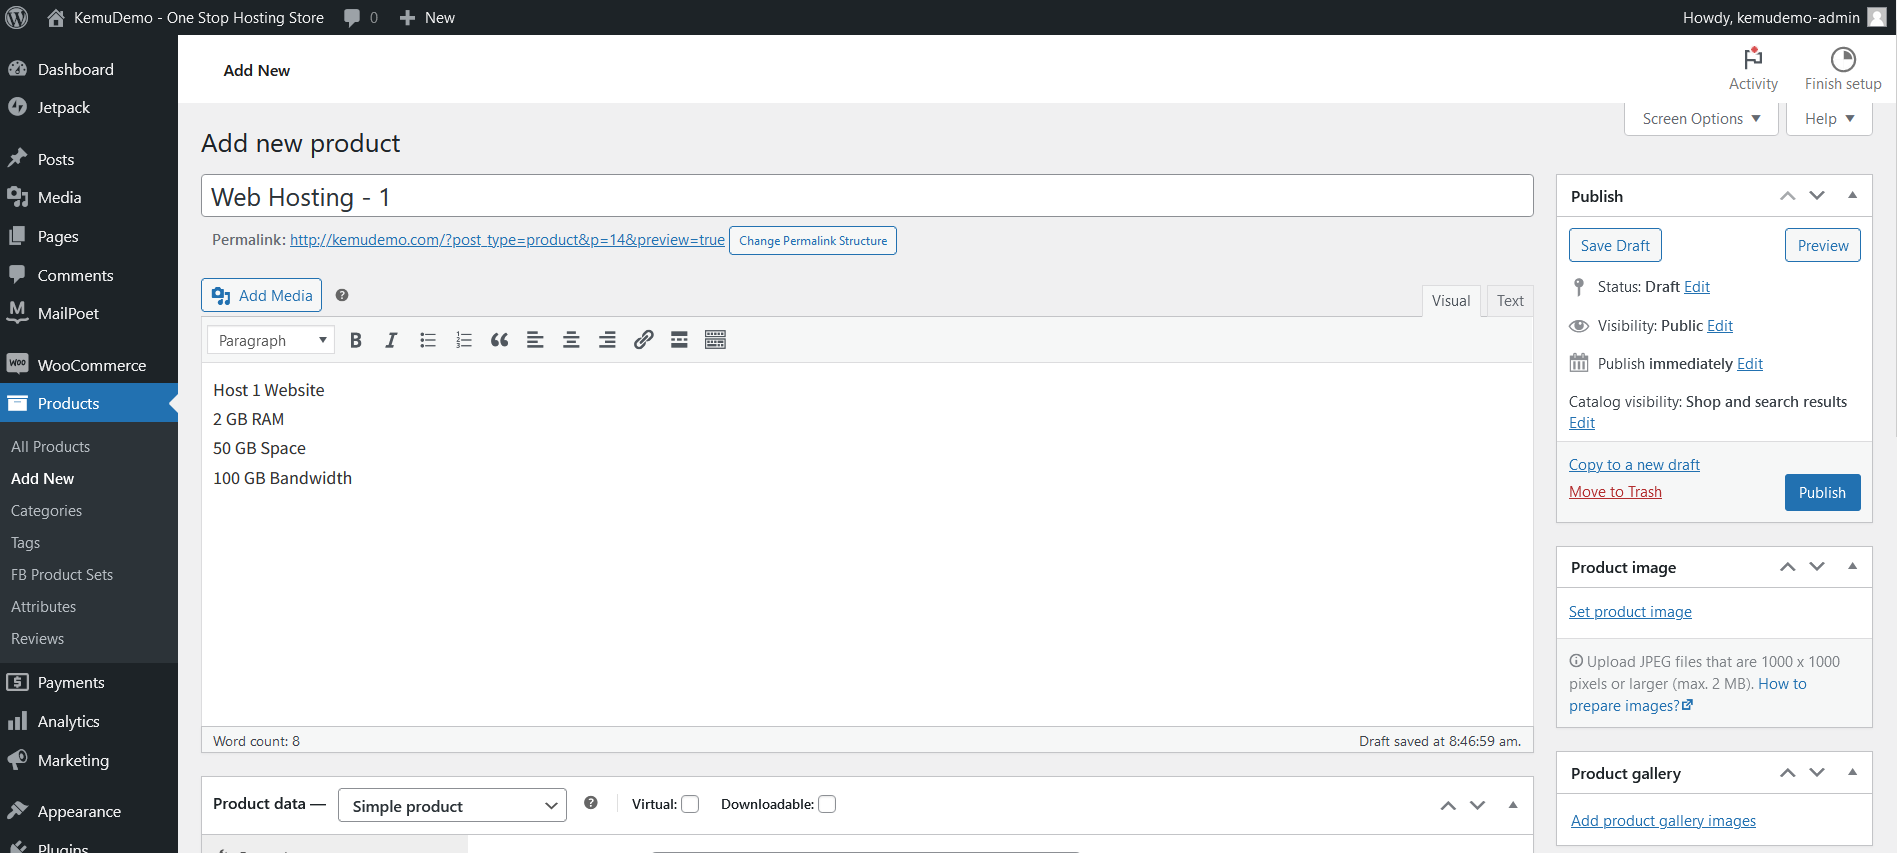
3: Add all your products with the proper name, description, and price information.
WooCommerce Payments Setup

Now, it is time to integrate a payment gateway into our store.
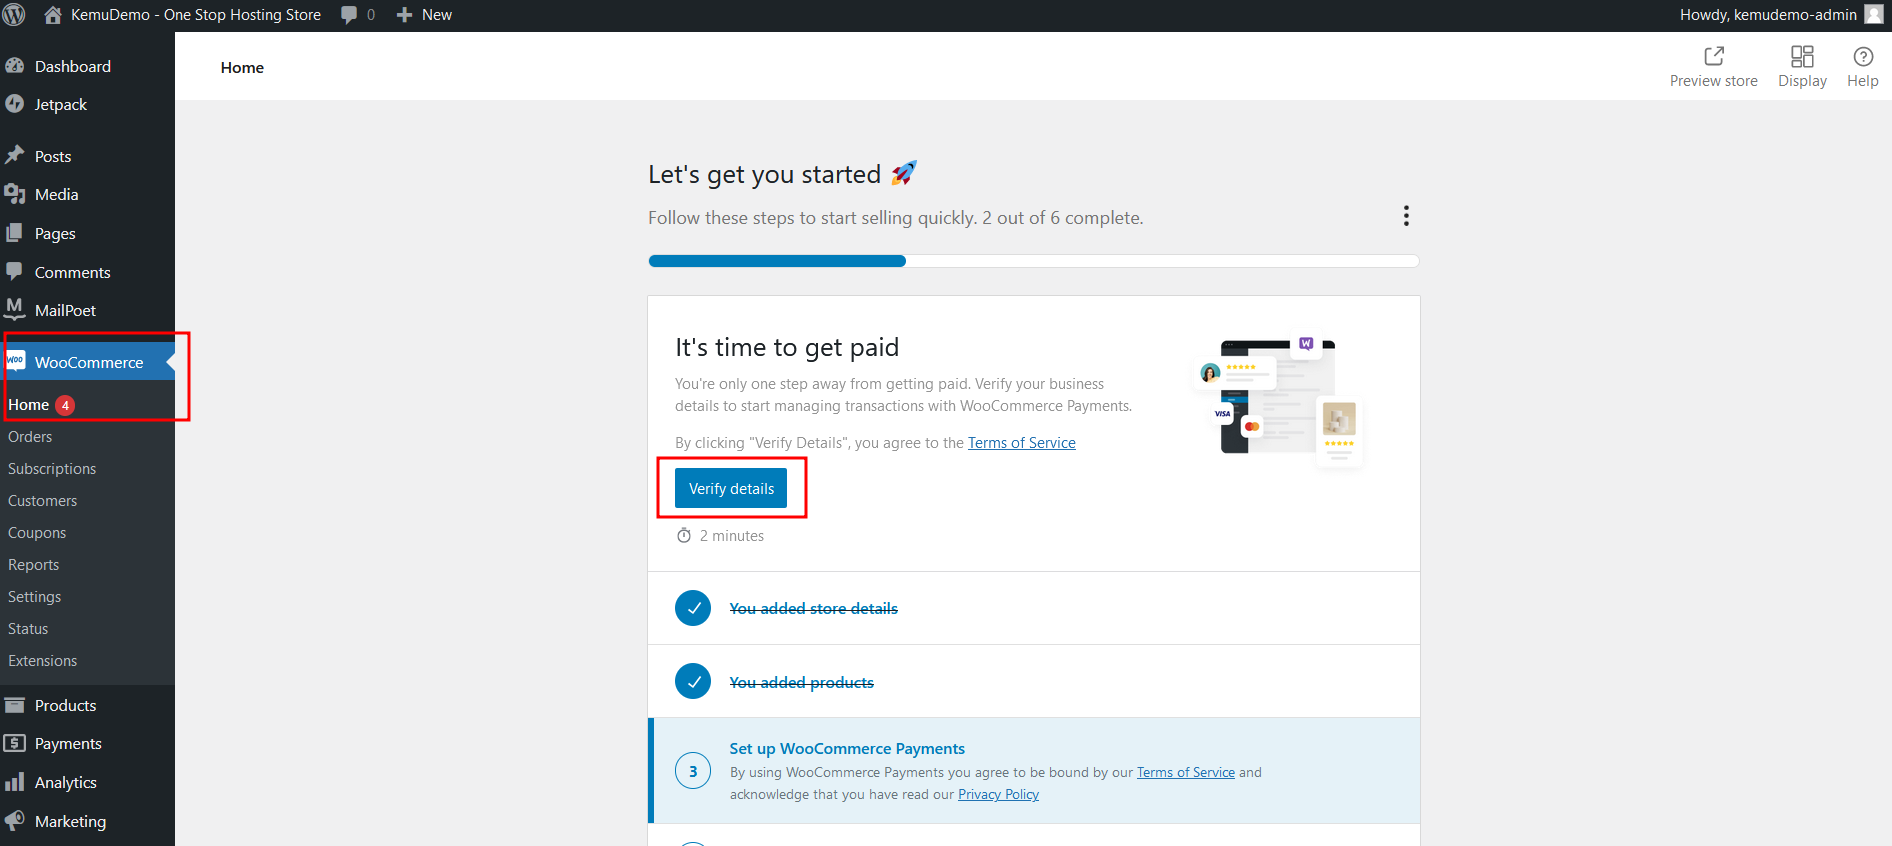
1: From your WordPress Admin Area, navigate to WooCommerce ⇒ Home ⇒ Click on “Verify details” under the “It’s time to get paid” section.
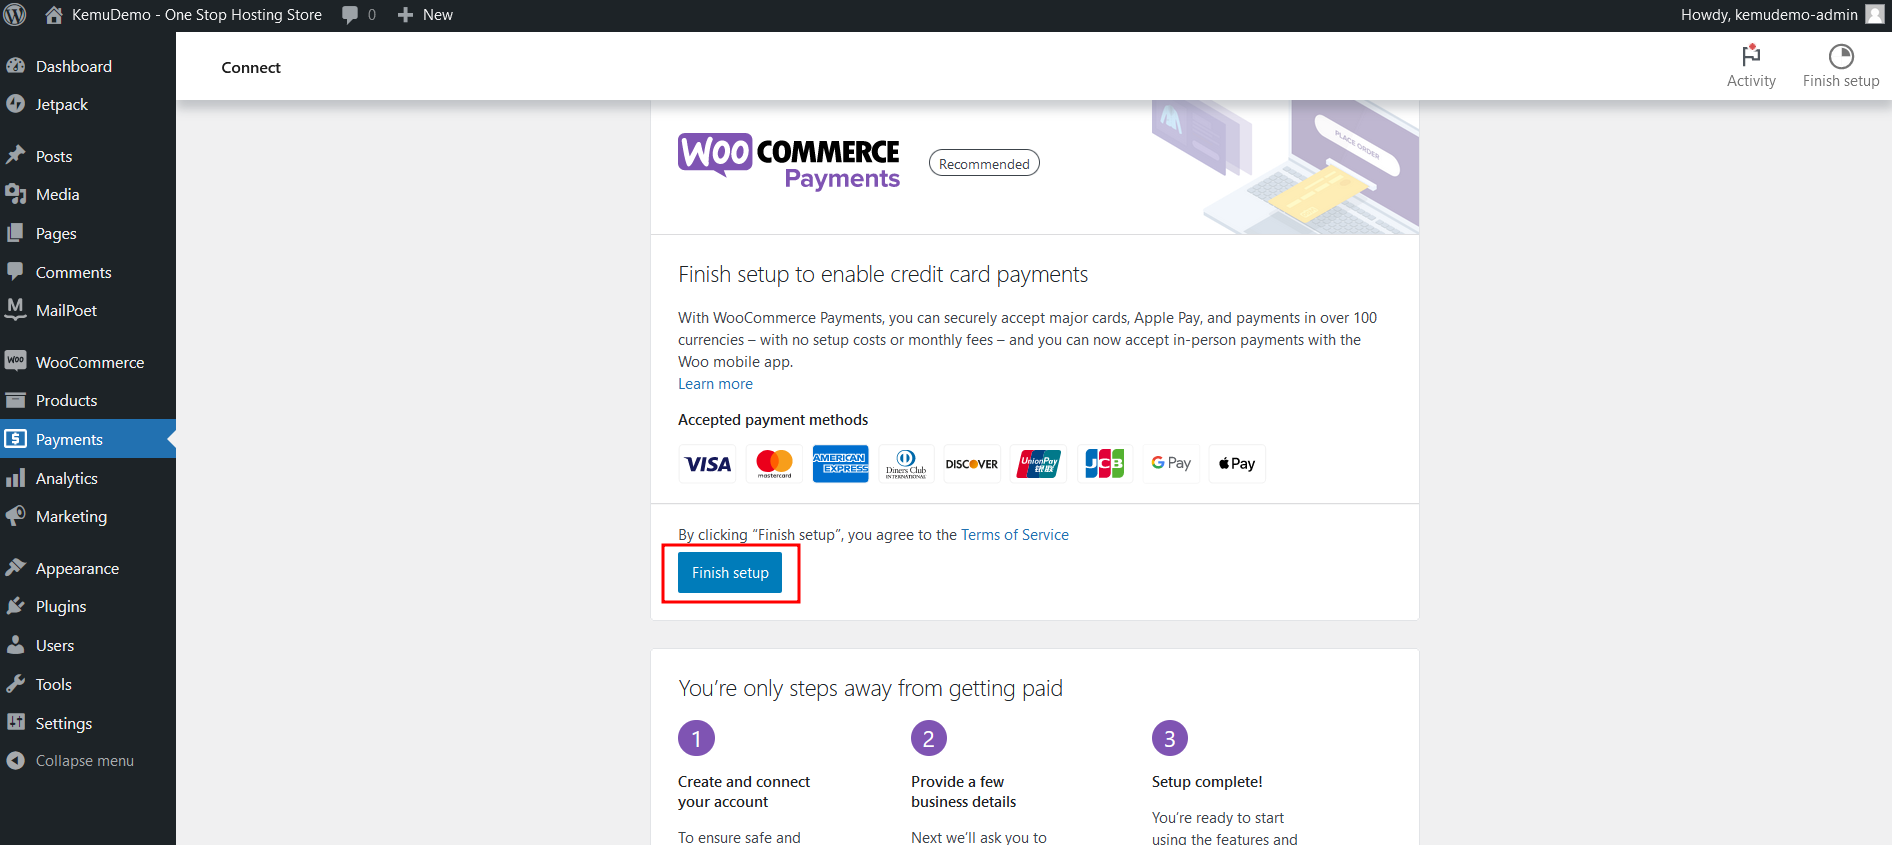
2: You can accept payment from Visa, MasterCard, American Express, Discover, JCB, GPay, and many more. Click on Finish setup to proceed.
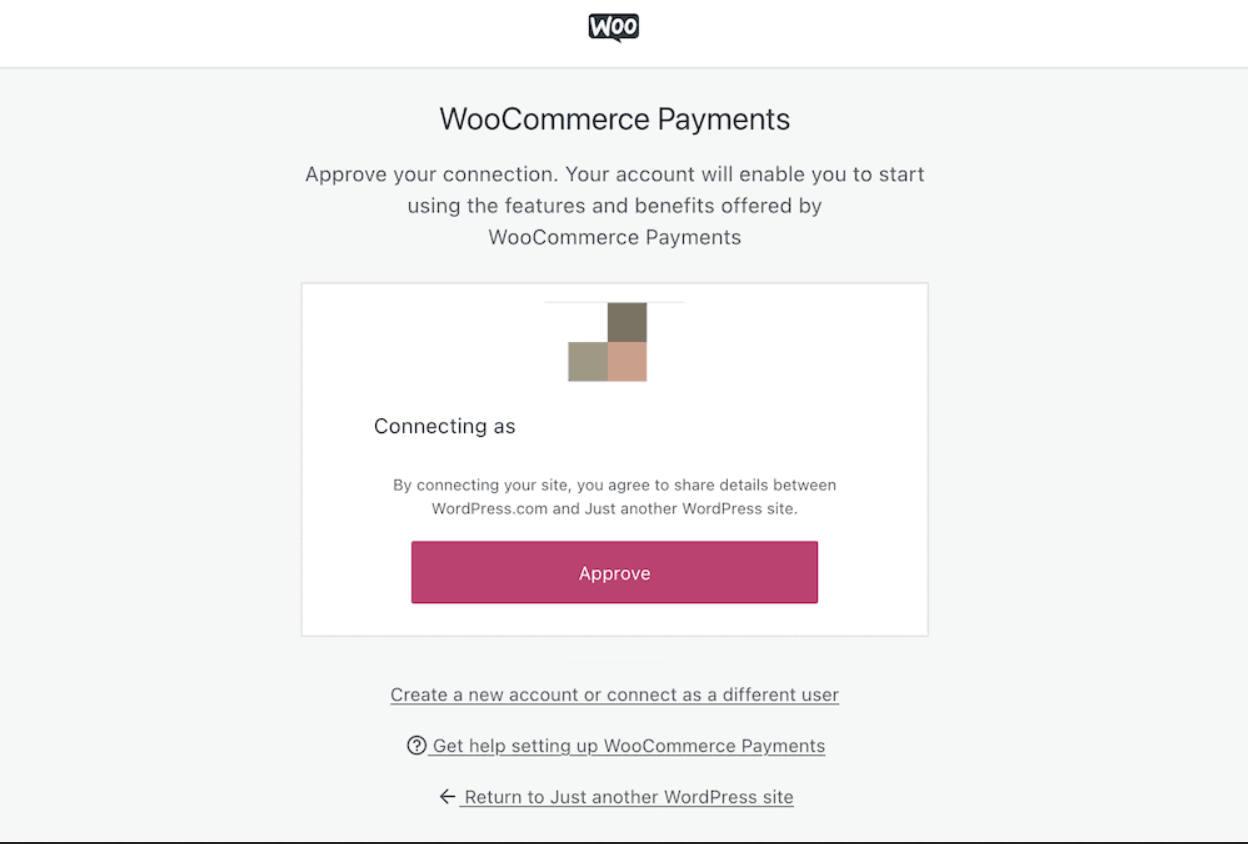
3: We will now connect our site to WordPress.com. Click on the Approve button.
4: Enter the email address to receive important updates.
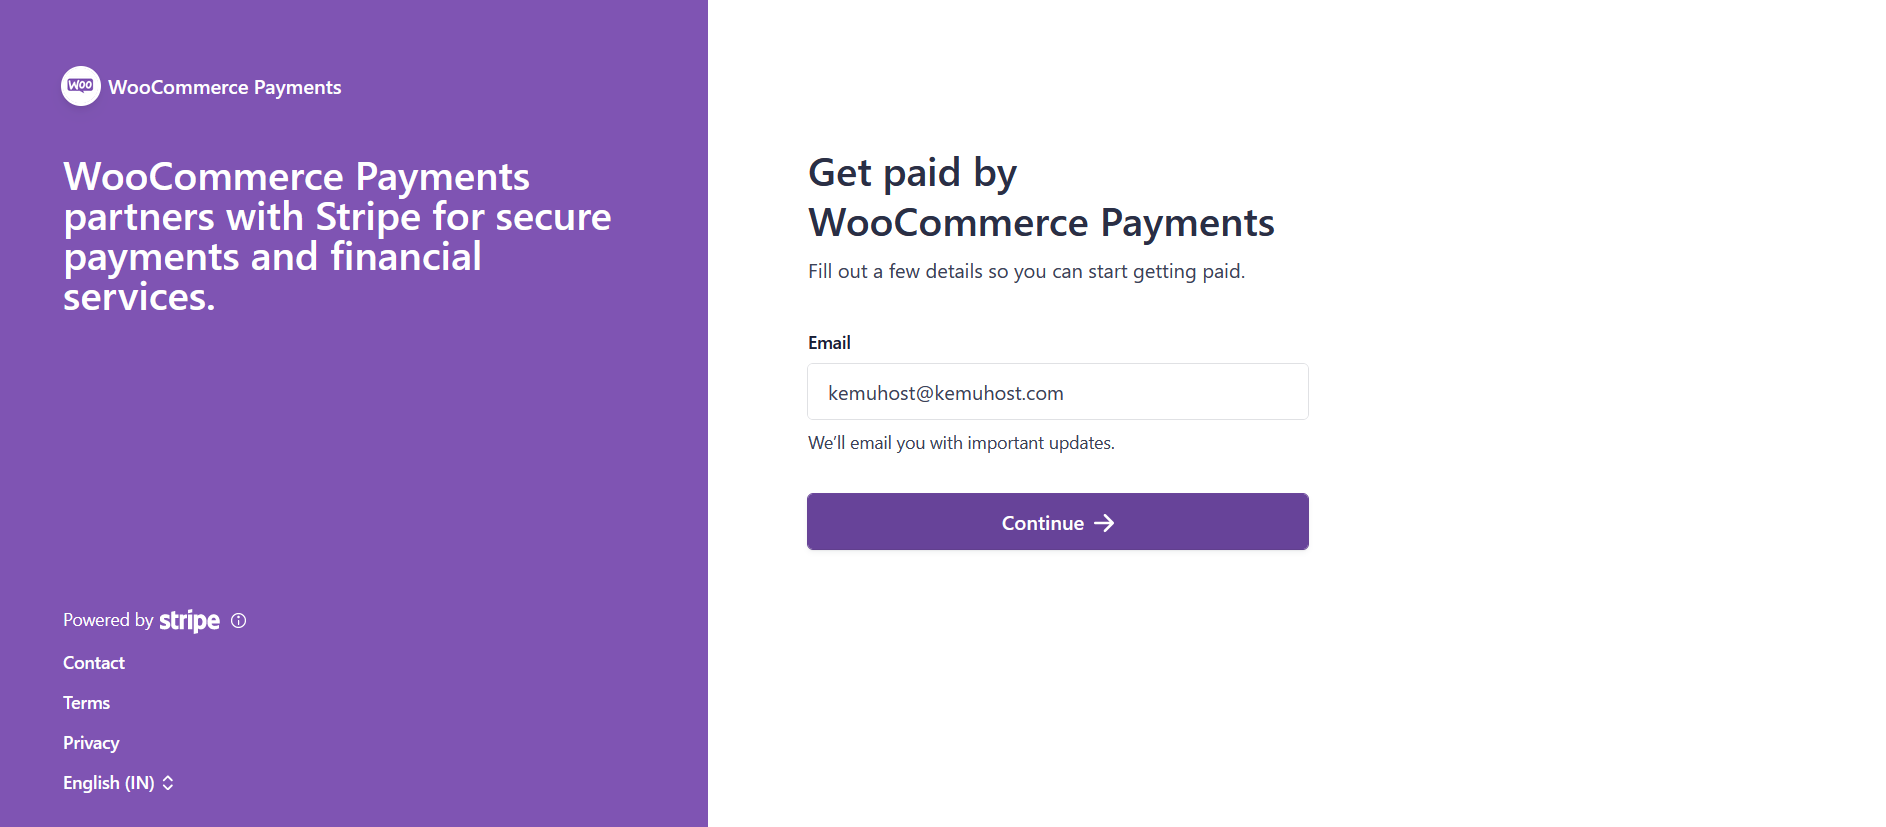
5: The setup will ask you to enter your details and an active bank account for your business. Enter the details and click on Continue.
6: Once you complete this process, you’re ready to dive deeply into the WooCommerce Payments interface. You can now accept payments from your customers.
You can also adjust tax rates, personalize the store, and add marketing tools to get more customers. Under the WooCommerce menu, you will see other significant options such as; Orders, Subscriptions, Customers, Coupons, Reports, and many more.
It is always recommended that you regularly monitor your products and update them as required. You should also perform regular maintenance of your WordPress. You may refer to our Essential Website Maintenance Tips for more details.
Add a Shopping Cart to WordPress – The Conclusion
WooCommerce is an excellent eCommerce platform for WordPress. It provides a much more robust integration with WordPress than any other eCommerce plugin. We hope this guide helped you to add a shopping cart to WordPress without any technical or coding knowledge. You now have your web store to sell your services online. If you still have questions or need assistance during the setup, feel free to contact us.

